« 3.2: Conditional Statements |
3.4: Randomness »
Iteration
Consider that you wish to tile a floor. Starting in one corner, you place a single tile. Next, you place another tile alongside that, repeating the process until you’ve reached the opposite wall; after which point you move down a row and continue. In this scenario, the placing of an individual tile is referred to as an iteration. In many iterative processes, the result of a previous iteration defines the starting point of another – in this case, the position of each tile is advanced by the one laid before it.
Tasks like tiling can be tedious work, though. Humans are exemplary in reasoning and creative thought, and if not sufficiently stimulated, lose interest in performing such repetitive tasks. Computers, however, excel in performing monotonous duties rapidly and accurately – especially where numbers are involved. Interestingly enough, the term “computer” originally referred to a person who performs mathematical calculations. Much of the work carried-out by ‘human computers’ involved calculating mathematical tables. These tables of numbers would be compiled into printed volumes that were used to simplify and speed-up other computations. As an example, logarithm tables were used extensively in sciences, engineering, and navigation.
Nathaniel Bowditch, originally; National Imagery and Mapping Agency, U.S. Government [Public domain], via Wikimedia Commons
Rather than perform tedious multiplication and division operations by hand, logarithm tables provide lists of pre-computed answers – like a more advanced version of the multiplication tables children are required to memorise in school. The forerunner of the modern computer, the Difference Engine, was built in the 1820s by Charles Babbage to automate the work of human computers. By devising a machine comprised of cogs and other moving parts, Babbage sought to automate the task of producing mathematical tables, while also providing more accurate results. Due to funding difficulties, a full-scale version of the machine was never completed – but its mechanical inner-workings paved the way for more complex electronic computers.
To begin exploring iteration in Processing, create a new sketch and save it as “concentric_circles”. Add the following code:
size(500,500)
background('#004477')
noFill()
stroke('#FFFFFF')
strokeWeight(3)

ellipse(width/2,height/2, 30,30)
ellipse(width/2,height/2, 60,60)
ellipse(width/2,height/2, 90,90)
I’m sure you can see where this is heading – filling the display window requires writing many more ellipse lines. Instead of adding these manually, you’ll make use of Python’s while loop to insert them iteratively.
While Loops
The while loop statement looks and behaves much like the if. However, the key difference is that the while continues to execute the lines indented beneath it until the condition is no longer true.
Comment out your ellipse lines and add a basic while structure:
'''
ellipse(width/2,height/2, 30,30)
ellipse(width/2,height/2, 60,60)
ellipse(width/2,height/2, 90,90)
'''
i = 0
while i < 24:
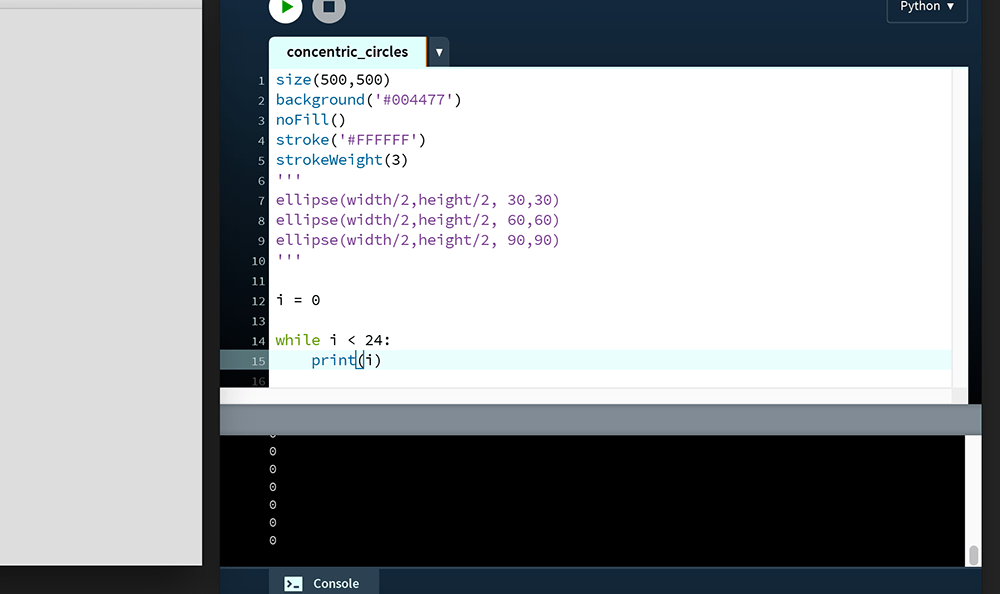
print(i)Running the sketch prints endless lines of single 0 digits to the Console.
This code has crashed your program by sending it into an infinitive loop. To explain, i is equal to zero, and therefore less-than 24. But, unlike an if statement, the while repeatedly executes the print line until the value of i reaches twenty-four – which is never.
To increment i by one each time the line is printed, add one to it with each iteration of the loop:
i = 0

while i < 24:
    print(i)
    i = i + 1
You may name this i variable whatever you wish, but it’s a popular convention to represent the counter value using an i.
The final line (i = i + 1) states that i is equal to itself plus one. Once i reaches twenty-four, the program can continue with any other code that follows beneath the loop structure. To draw twenty-four circles, place an ellipse function within the loop:
i = 0

while i < 24:
    print(i)
    ellipse(width/2,height/2, 30,30)
    i = i + 1
Run the code. It appears that you’ve drawn a single circle:

However, what you are actually is seeing twenty-four circles of the same size drawn in the same location. Adapt the ellipse, using the i value as a multiplier for the width and height (third and fourth) arguments:
i = 0

while i < 24:
    print(i)
    ellipse(width/2,height/2, 30*i,30*i)
    i = i + 1
It should be pointed out that the width/height arguments (30*i) of the first iteration are multiplied by 0, so the first circle is placed in the very centre of the display window but is effectively too small to be visible. The other twenty-three are sufficient to fill the 500 by 500-pixel area – but by changing the condition, you can draw as many (or as few circles) as you like.
Augmented Assignment Operators
You are already familiar with the = operator, but not its arithmetic variants. In the “concentric_circles” example, i was incremented using this line of code:
i = i + 1
To simplify this statement, one can instead write:
i += 1
Other similar operators include:
i -= 1 is equivalent to i = i - 1
i *= 1 is equivalent to i = i * 1
i /= 1 is equivalent to i = i / 1
For anybody familiar with other programming languages, Python does not make use of -- and ++ in/de-crement operators.
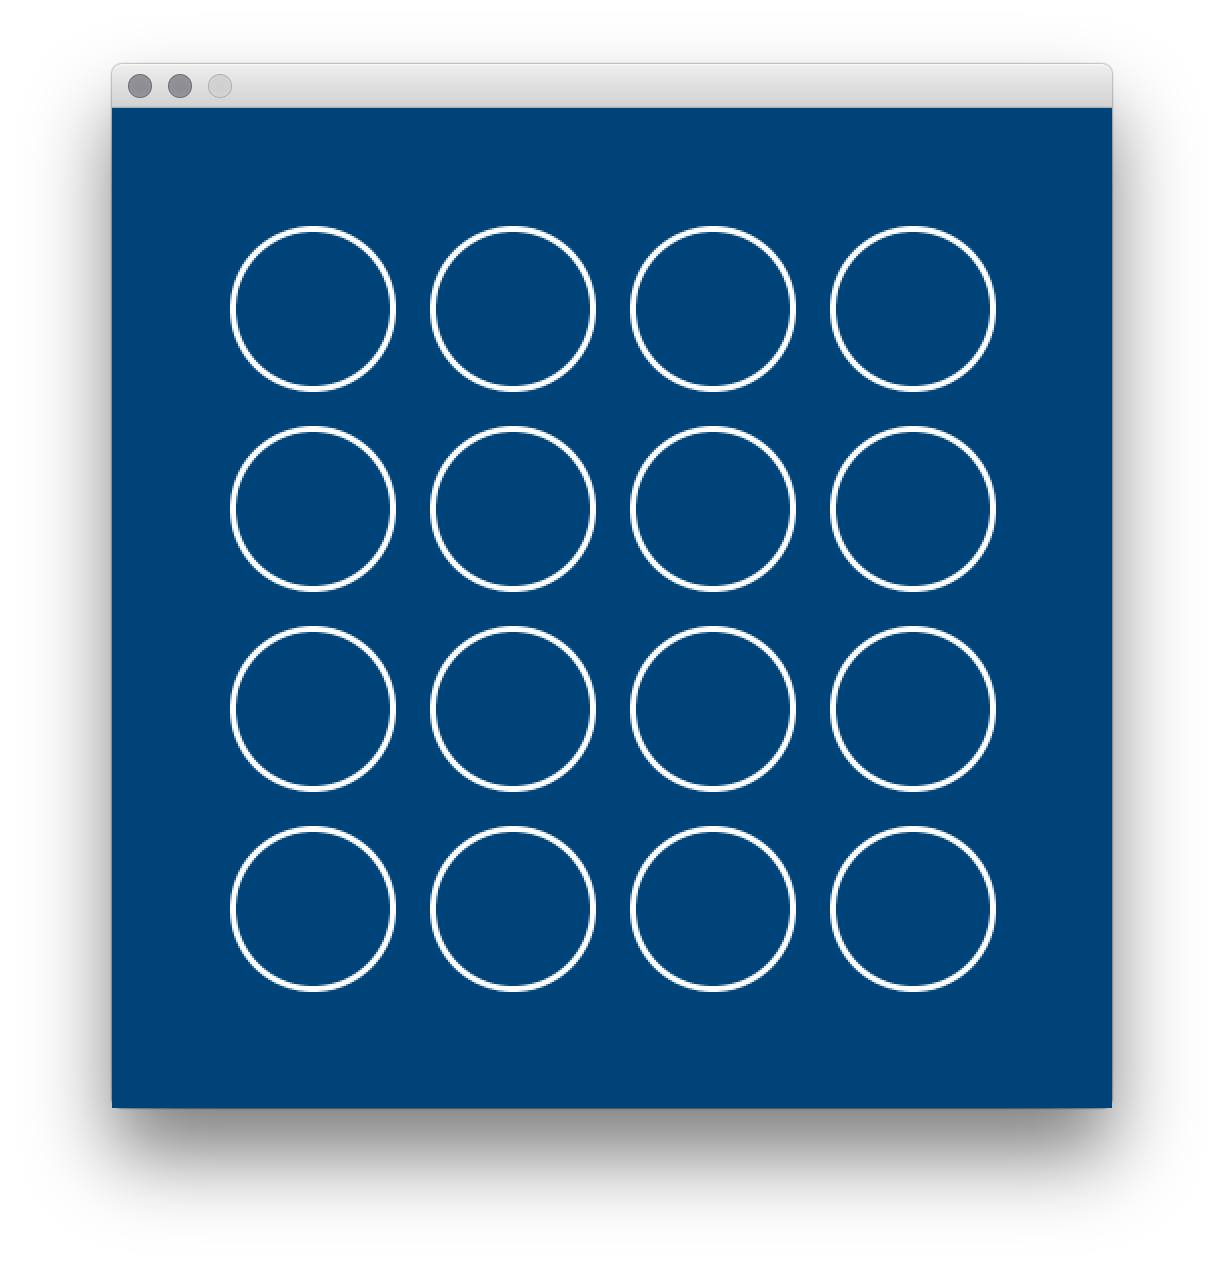
Rows of Circles Task
Time for another challenge!
Using a while loop, you’ll recreate this arrangement:
To begin, create a new sketch and save it as “rows_of_circles”. Add the following code to get started:
size(500,500)
background('#004477')
noFill()
stroke('#FFFFFF')
strokeWeight(3)
ellipse(100,100, 80,80)
The following sequence of steps outlines the most straightforward approach to begin tackling this task:
- create a
whilestructure that loops sixteen times (consider using aprint()to monitor your counter); - using the loop, place the circles in one long row, extending past the right edge of the display window;
- once the above is working, use an
ifstatement within the loop to detect when the second row must begin.
It’s up to you to figure out the rest. Oh – and remember that modulo operator (%)? It may prove handy here.
For Loops
When programming a loop structure, you are not limited to while statements. The for loop operates similarly; depending on the scenario, you may elect to use one over the other. Perhaps the easiest way to explain a for loop is to convert something you’ve already written.
Create a new sketch and save it as “for_loop”. Add the following the code from your “concentric_circles” sketch:
size(500,500)
background('#004477')
noFill()
stroke('#FFFFFF')
strokeWeight(3)
i = 0
while i < 24:
print(i)
ellipse(width/2,height/2, 30*i,30*i)
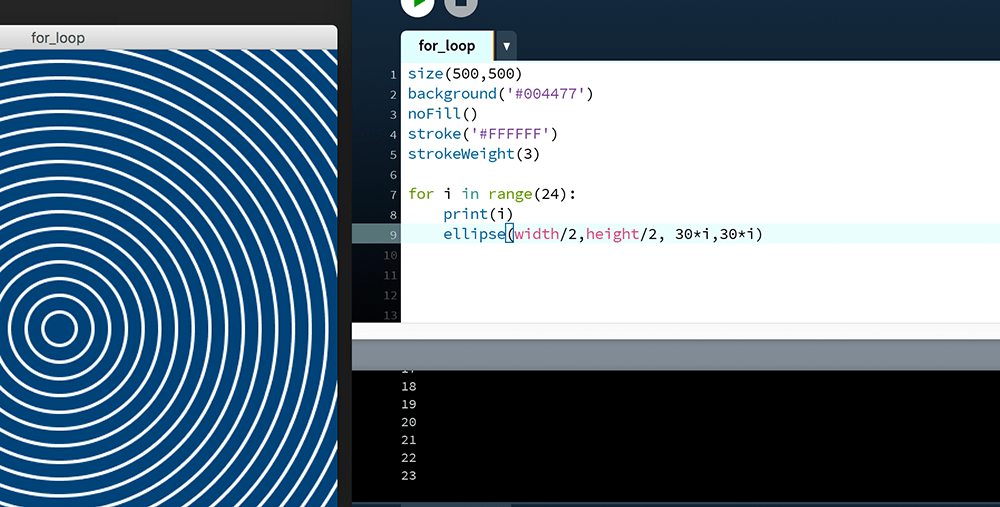
i += 1Notice how the i variable is created to serve as an counter. With each iteration of the loop, it’s vital that you increment i to avoid entering an endless loop. The for loop does away with the need for counter variables. Adapt your code to make use of a for:
size(500,500)
background('#004477')
noFill()
stroke('#FFFFFF')
strokeWeight(3)

for i in range(24):
    print(i)
    ellipse(width/2,height/2, 30*i,30*i)
Notice how the i = 0 line has been removed, along with the line to increment it (i += 1). Despite these changes, the result remains the same:
The range() function generates a list of values that the for then iterates over. With each iteration, the acting range value is assigned to the variable i – although you may name this whatever you wish. For twenty-four iterations, the range function requires an argument of 24; but the end value of twenty-four is never part of the generated list because the first iteration begins with 0.
The range function can handle between one and three parameters. Provide two arguments for a start and end value:
for i in range(8,12):
    print(i)
    ellipse(width/2,height/2, 30*i,30*i)
Provide three arguments for a start, end, and step-size:
for i in range(0,12,3):
    print(i)
    ellipse(width/2,height/2, 30*i,30*i)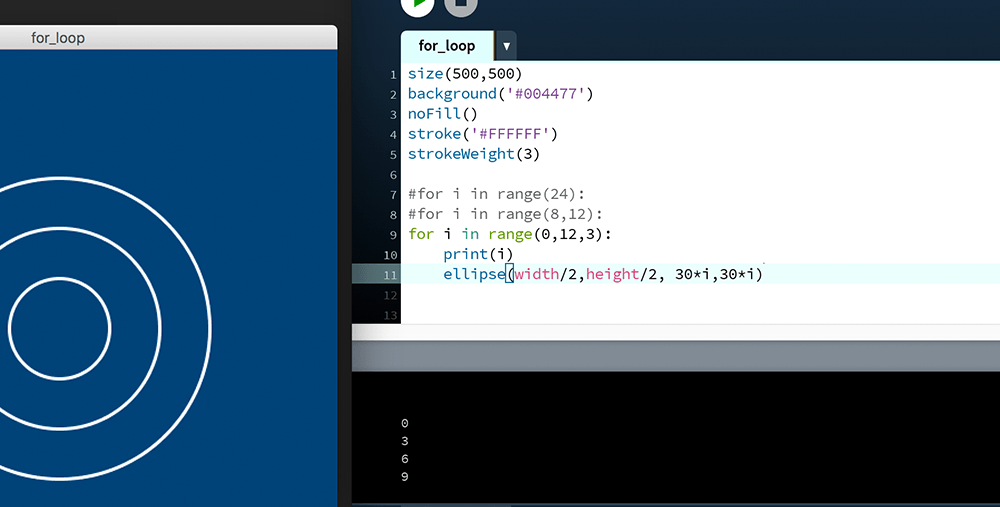
Any iterable object may be used in combination with a for, meaning the range() function is not always necessary. This concept is explored in the upcoming lessons dealing with lists and dictionaries (or “arrays” if you are familiar with other programming language terminology).
For Loops Task
In this challenge you’ll recreate these three patterns using for loops:
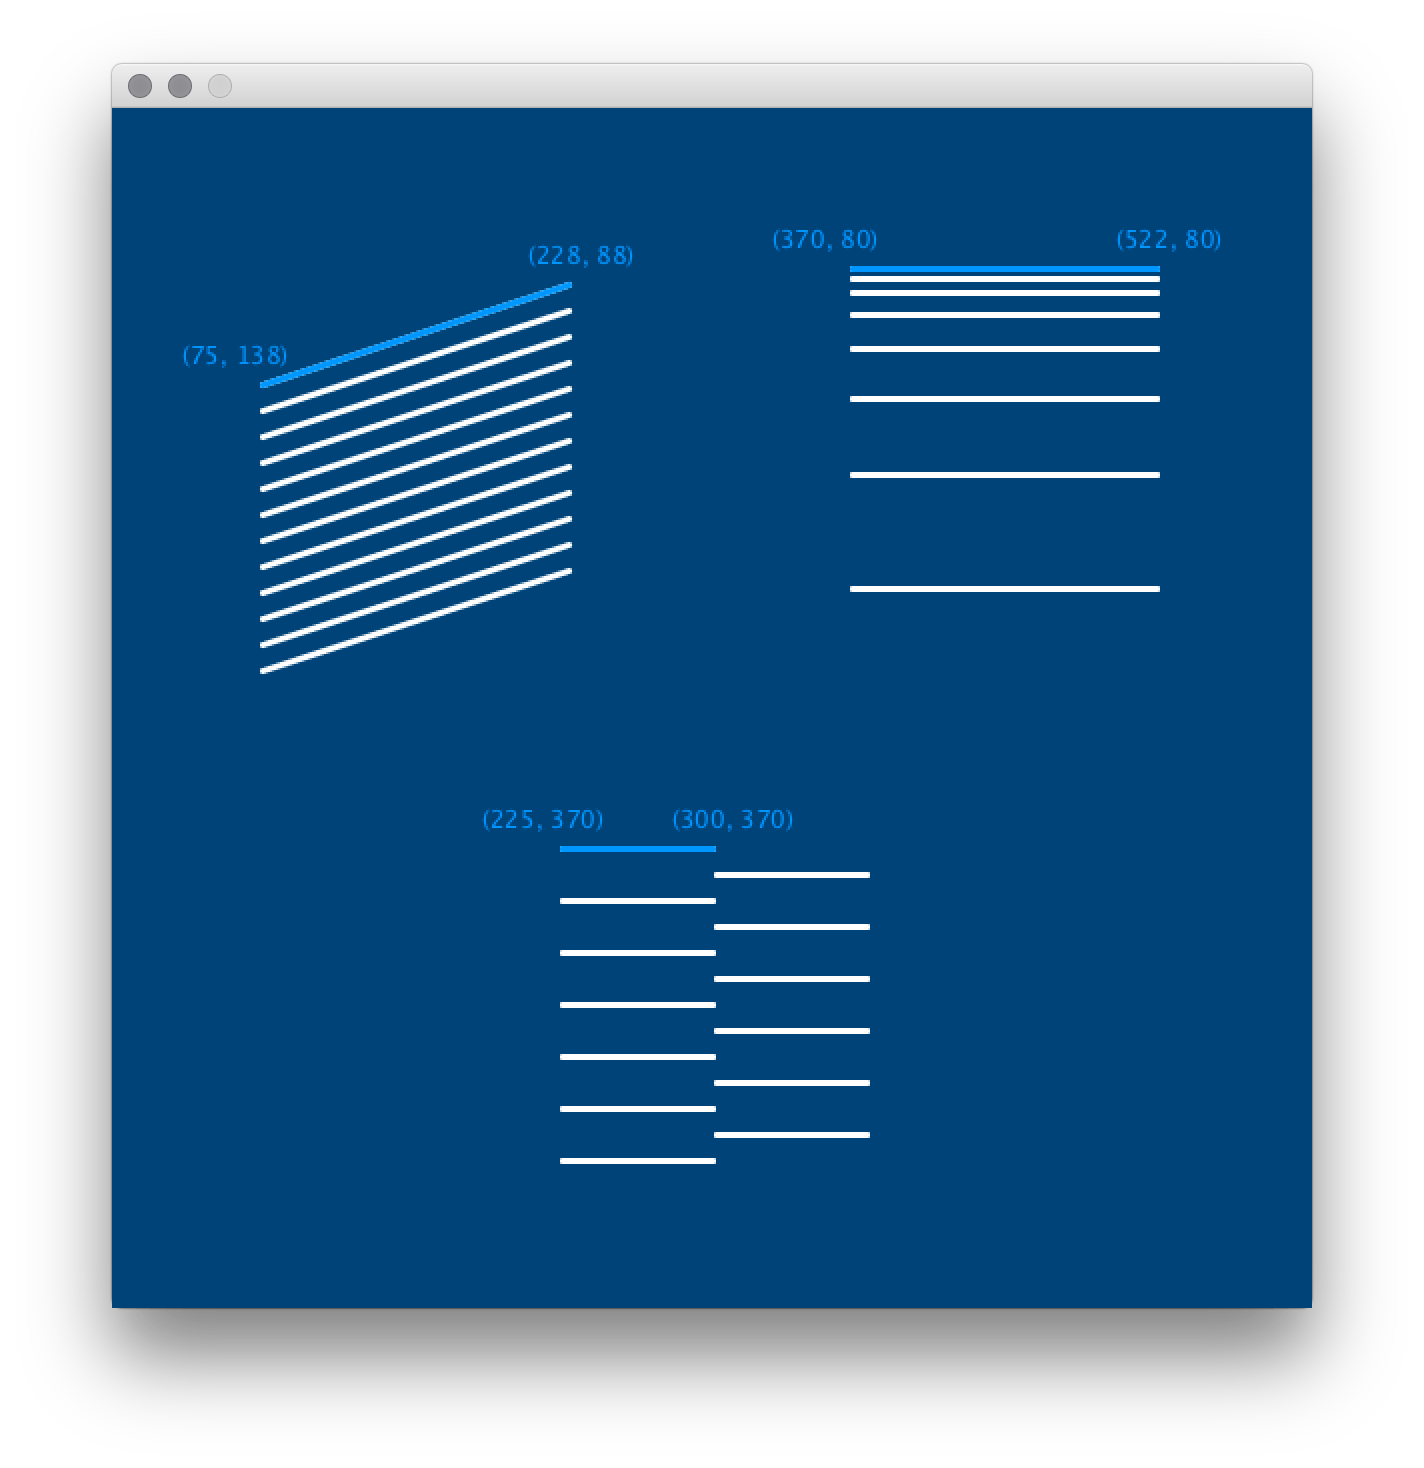
You’ll be referencing this image repeatedly during the task, so it may be useful to save a copy and open a preview of it alongside your Processing editor.
To begin, create a new sketch and save it as “for_loops_task”. Add the following setup code:
size(600,600)
background('#004477')
noFill()
stroke('#FFFFFF')
strokeWeight(3)
Here are a few clues to help you approach each pattern:
- Top-left pattern: you should manage this without any hints; it has twelve lines if you must know.
- Top-right pattern: the line spacing increases by a multiple of
1.5with each iteration. - Bottom-centre pattern: consider using a modulo operator to establish
ifthe counter is odd or even.
After successfully completing this, you should have a decent grasp of loops.
3.4: Randomness »
Complete list of Processing.py lessons