This is the second post in a three part tutorial series introducing vectors. It extends on what was produced in part 1. If you missed this, you should start here.
This instalment covers normalizing vectors, dynamic HUD read-outs, and coding additional physics features (such as acceleration and friction).
Normalizing Vectors
Normalization refers to a process that adjusts something to bring it within a regular/normal range. For example, many albums in my MP3 collection are louder than others. This isn’t a problem when listening to an album from start to finish, but when I switch to playing random songs across my entire collection, I’m constantly having to adjust the volume dial. To solve this problem, I scanned the entire collection using ReplayGain software. This software analyses and adds some metadata to each track indicating its overall “loudness” in relation to a standard of 89 dB. When my audio player loads a track, it reads the ReplayGain metadata and automatically adjusts the volume to compensate, thus normalizing the loudness of the tracks. The tracks still contain the same audio information, but the playback volume is now governed precisely by my dial.
Normalizing vectors works on a similar principle: the length/magnitude of the vector is converted to a standard unit (of 1) from which it can be increased or decreased while still containing the same direction information. To accomplish this, the x, y, and length values are each divided by the length, resulting in a magnitude of 1:

The result is referred to as a unit vector. Unit vectors are notated using a circumflex – for instance unit vector u would be written as û.
Normalizing Nyan Cat’s Key Input
At the end of part 1 the Console output revealed that Nyan Cat’s key input can reach a magnitude of ~16.97 diagonally, yet never exceeds 12 when it’s directly vertical or horizontal:
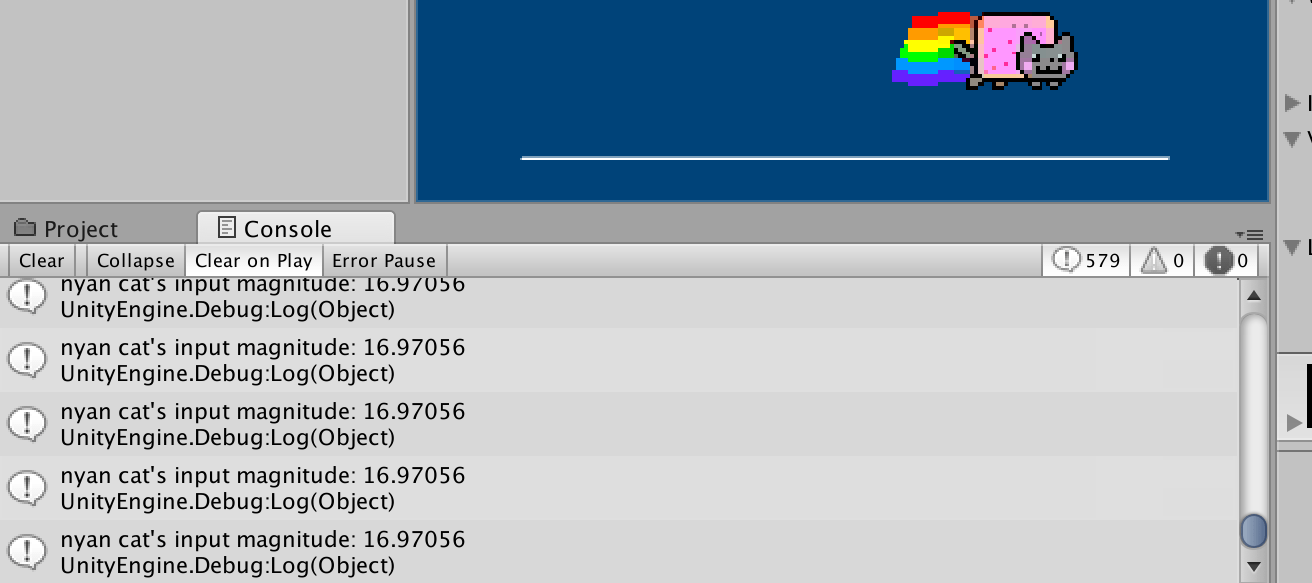
To recap, the Update code multiplies the key input by 12 to produce greater thrust:
function Update () {
  input.x = Input.GetAxis('Horizontal');
  input.y = Input.GetAxis('Vertical');
  input = multiply(input, 12);
  Debug.Log("nyan cat's input magnitude: " + magnitude(input));

  ...
To ensure that Nyan Cat’s thrust is limited to 12 in every direction, the input vector must be normalized before it’s multiplied it by 12. Add a normalize function to perform the arithmetic (of dividing every side by the length), and employ it in the Update function:
...

function normalize(v:Vector) {
  var length:float = magnitude(v);
  var norm:Vector;
  norm = divide(v, length);
  return norm;
}

...

function Update () {
  input.x = Input.GetAxis('Horizontal');
  input.y = Input.GetAxis('Vertical');
  input = normalize(input); // normalize thrust
  input = multiply(input, 12);
  Debug.Log("nyan cat's input magnitude: " + magnitude(input));

  ...
Save your code and test. Nyan Cat will have frozen, but you can use the arrow keys to generate Console output, regardless. Note how, for any directional input (diagonal or otherwise), the Debug.Log reads:
nyan cat's input magnitude: 12
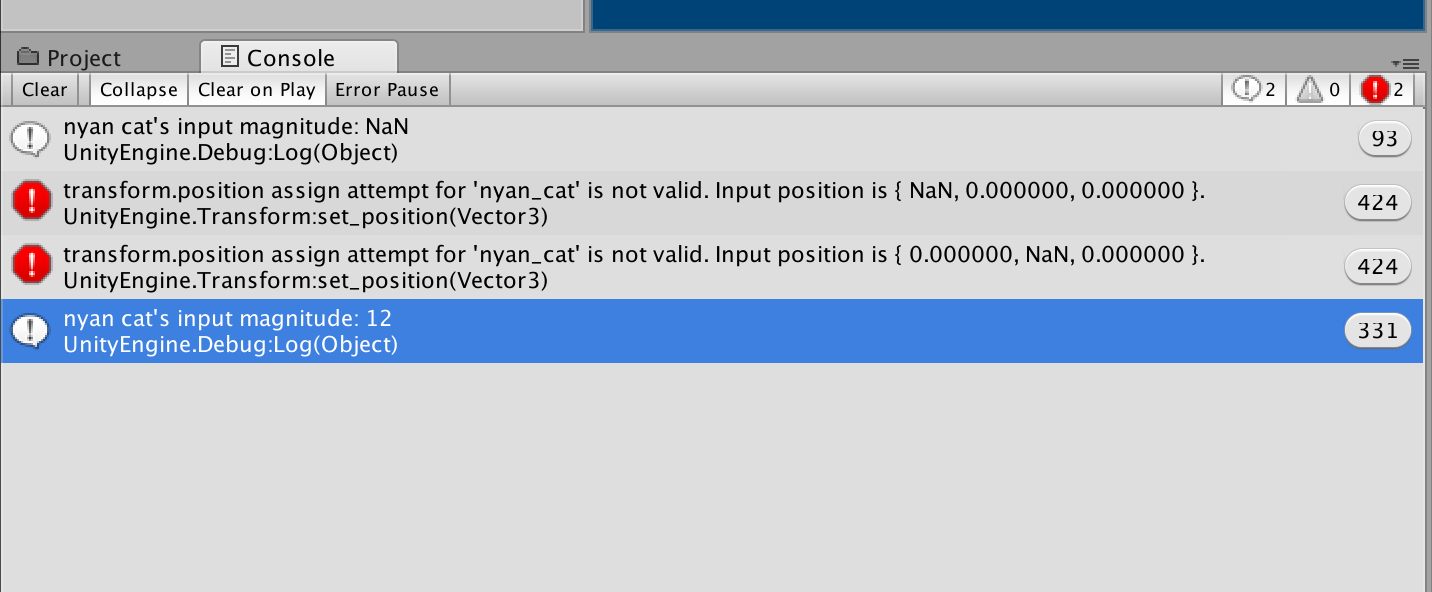
The input magnitude is now equal in all directions. The problem is that Nyan Cat has stopped moving altogether! However, there are NaN errors in the console to provide some hint as to what could be wrong. If you are not familiar with such errors, NaN is an acronym for Not a Number. In this case, the normalize function is returning a NaN in the absence of key input – which is actually the result of a division by zero. Add a condition the normalize function to resolve this:
function normalize(v:Vector) {
  var length:float = magnitude(v);
  var norm:Vector;

  if (length != 0) {
    norm = divide(v, length);
    return norm;
  }
  else {
    return v;
  }
}
Nyan Cat is moving again, but is unable to move diagonally-up-and-left (northwest) across the screen. (S)he can no longer achieve a diagonal input thrust of 16.7 – instead maxing out at 12 – and, as a result, is now overwhelmed by the combined forces of wind and gravity. You’ll also notice a slightly delayed reaction to releasing the arrow keys. This has nothing to do with your code, but is related to the input manager settings.
Adjusting Input Manager Settings
The Unity Input Manager allows you to reference your inputs by axis name – for example: Input.GetAxis('Vertical'). This is useful because you can map multiple device axes (of gamepads, keyboards, etc.) to the same name, and then reconfigure your inputs without having to edit your code.
The delayed input Nyan Cat is experiencing is due to Unity’s analog stick emulation. Whereas a key registers as either pressed or not pressed, an analog input is sensitive to any pressures between. For this reason keys and buttons return a 0 or 1, whereas analog inputs return a floating-point value ranging from 0.0 to 1.0. More correctly speaking, because the analog stick’s up and down are diametrically opposed, the Input.GetAxis('Vertical') values range between -1.0 and 1.0. When Unity is handling axis input from a keyboard, it mimics an analog stick by returning floating-point values – and even goes a step further: when one releases an arrow key, Unity simulates the stick’s re-centring by returning a range of values before reaching absolute zero again.
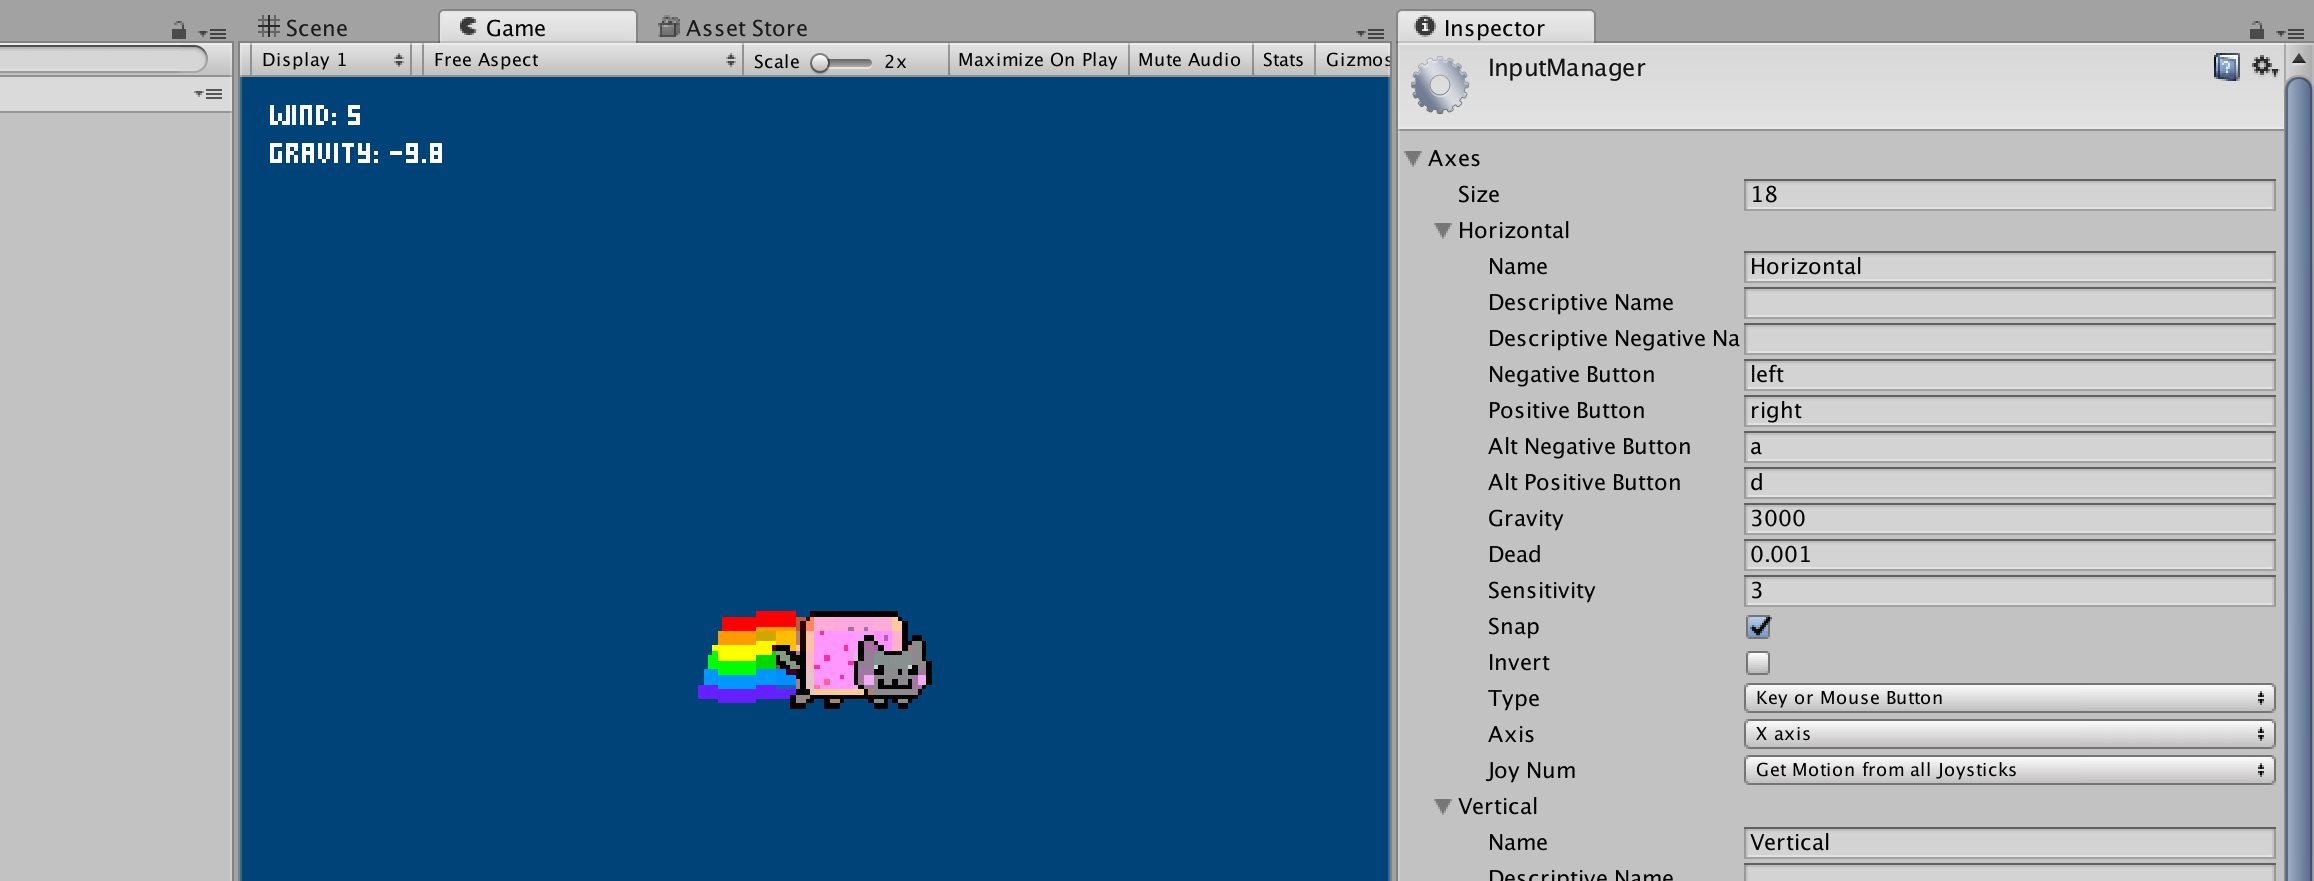
The normalize function does not work well with this, rounding the floating-point values to 1 (or -1) while the simulated re-centring occurs. However, Unity provides a setting to control the spring-back force, termed Gravity. Select Edit > Project Settings > Input and then, using the Inspector, set the Gravity to 3000 for both the Horizontal and Vertical axes:
Save your code and test to confirm that the key delay issue has been resolved.
Connecting the HUD
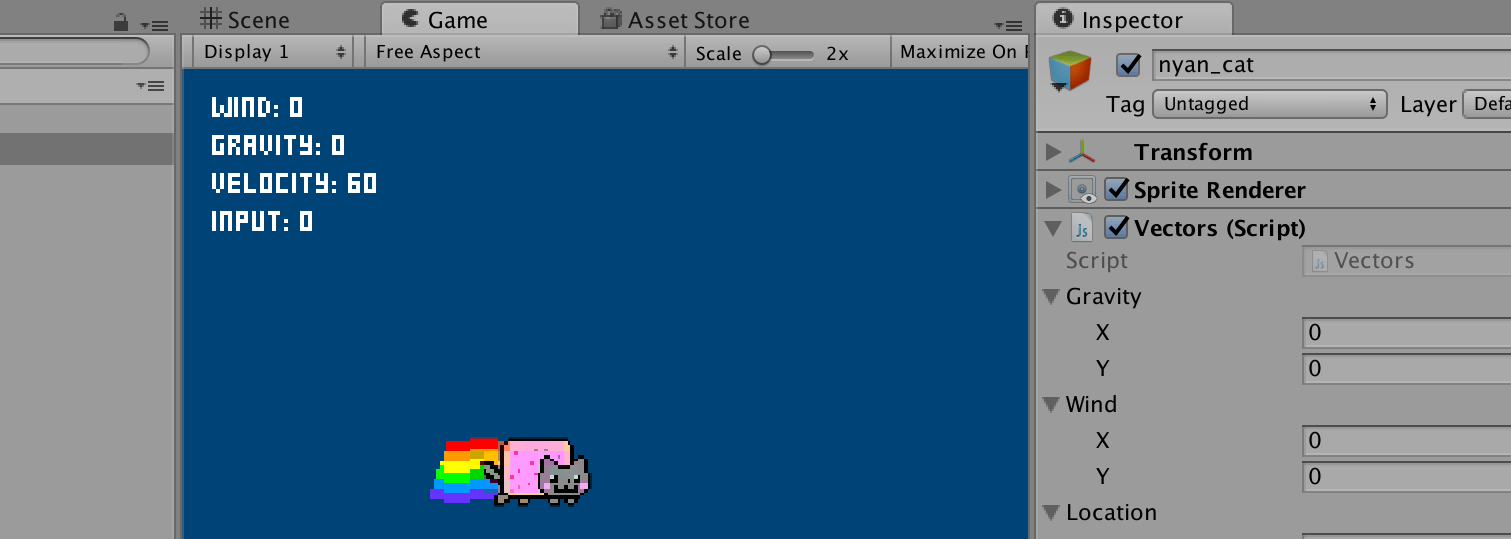
Currently, the HUD displays static information. Should you change the gravity or wind values, it will not reflect this. However, now that the magnitude of each force can be measured in real-time, the HUD can be connected to your code.
Select the object named Text in your hierarchy, and add a new script component to it named “HUD”:
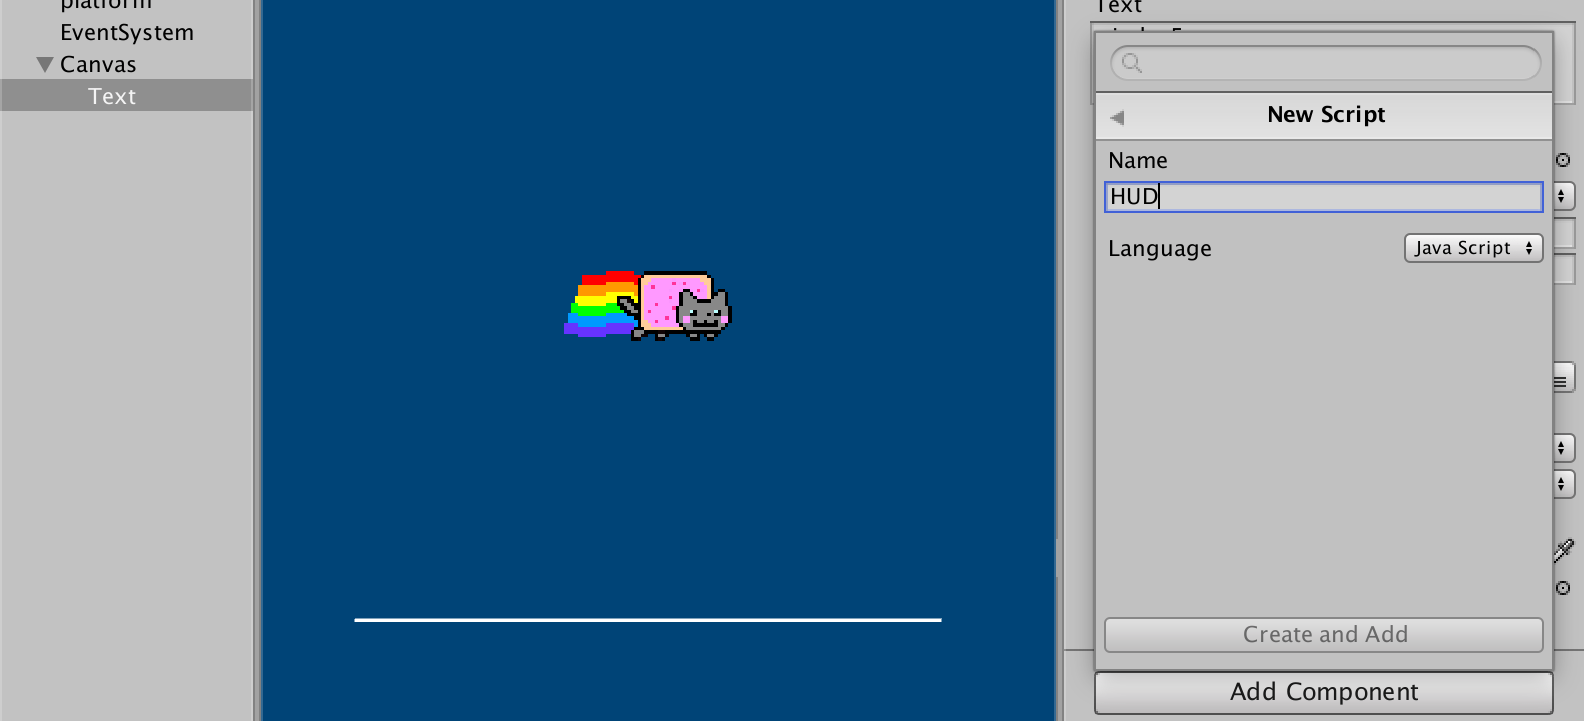
The code for the HUD script is fairly straight-forward. The vec variable points to Nyan Cat’s “Vector” script from which it retrieves the magnitudes of each force, outputting them to the HUD using the .text method:
#pragma strict

import UnityEngine.UI;

var vec:Vectors;
var hud:Text;
var nyan:GameObject;

function Start () {
  nyan = GameObject.Find('nyan_cat');
  vec = nyan.GetComponent.<Vectors>();
  hud = GetComponent.<Text>();
}

function Update () {
  var w:float = vec.magnitude(vec.wind);
  var g:float = vec.magnitude(vec.gravity);
  var v:float = vec.magnitude(vec.velocity);
  var i:float = vec.magnitude(vec.input);

  hud.text =  'wind: '     + w + '\n';
  hud.text += 'gravity: '  + g + '\n';
  hud.text += 'velocity: ' + v + '\n';
  hud.text += 'input: '    + i + '\n';
}
You should now have a functioning HUD, listing four forces in real-time:

Remove the Debug.Log line in the “Vectors” script now that it’s no longer necessary.
Acceleration
The velocity represents the sum total of the all vectors acting on Nyan Cat. With each iteration of the Update function, it’s recalculated and added to the cosmic feline’s previous location. No matter how many forces are included, the same principle applies. Consider, for instance, a scenario with additional updrafts, thrusters, propellers, and afterburners:
  ...
  velocity = add(velocity, gravity);
  velocity = add(velocity, wind);
  velocity = add(velocity, updraft);
  velocity = add(velocity, thruster);
  velocity = add(velocity, propeller);
  velocity = add(velocity, afterburner);

  location = add(location, velocity);
  ...
Acceleration is yet another vector, but one which accumulates velocity. Think of it like this: velocity is equal to itself plus any acceleration – and acceleration increases with each frame.
Add a new acceleration variable to the “Vectors” script; then edit the Update function:
...
var input:Vector;
var acceleration:Vector;

...

function Update () {
  input.x = Input.GetAxis('Horizontal');
  input.y = Input.GetAxis('Vertical');
  input = normalize(input);
  input = multiply(input, 12);

  acceleration = add(gravity, wind);
  acceleration = add(acceleration, input);

  velocity = add(velocity, acceleration);

  location = add(location, velocity);
  transform.position.x = location.x;
  transform.position.y = location.y;
}
As there’s no friction or drag (yet), Nyan Cat will accumulate speed rapidly. Zero the Gravity and Wind using the Inspector, then test and monitor the HUD to see how the velocity is increased as you continue to add further input in the same direction:
Were you to add a duplicate Nyan Cat to the simulation, (s)he would accelerate at an equal rate. But, what if this new Nyan Cat were made of lead? Lead surely weighs more than pop-tarts and fur, and – with the same forces were applied – should accelerate more gradually. More correctly speaking, lead has a greater mass.
Adding Mass
Newton’s second law states that force equals mass times acceleration. For coding this simulation, it’s useful to switch things around so that
force = mass × acceleration
is restated as:
acceleration = force ÷ mass
Now apply this formula to the “Vector” script along with a new mass variable:
...
var mass:float = 50;

...

function Update () {
  ...

  // replace this
  //acceleration = add(gravity, wind);
  //acceleration = add(acceleration, input);

  // with this
  acceleration = add(gravity, wind);
  var force:Vector = add(acceleration, input);
  acceleration = divide(force, mass);

  ...
Save and test. You’ll notice that Nyan Cat accelerates more gradually. You can also adjust the Mass using the Inspector to see how different values affect the simulation.
Friction
Currently, the only way to slow Nyan Cat’s heading in a given direction is to apply an opposite force using the arrow keys. Friction behaves in exactly the same way. Well, technically speaking, not exactly, but this tutorial is about vectors rather than perfectly accurate physics.
The velocity variable represents Nyan Cat’s current speed and heading, so calculating an inverse velocity is simple enough. Like finding the inverse of any scalar value, this is a multiply by -1 calculation:
function Update () {
  ...

  velocity = add(velocity, acceleration);
  friction = multiply(velocity, -1);
  velocity = add(velocity, friction);

  ...
Edit your code to match that of the above, then save and test. Note how Nyan Cat is unable to move as, no matter what forces are added to the velocity, an equal and opposite force is applied by the friction. Reduce the friction coefficient from -1 to -0.05:
  ...
  friction = multiply(velocity, -0.05);
  ...
Save and test. Nyan Cat now accelerates and decelerates, and although (s)he appears to drift to a complete stop, the velocity never quite reaches zero:
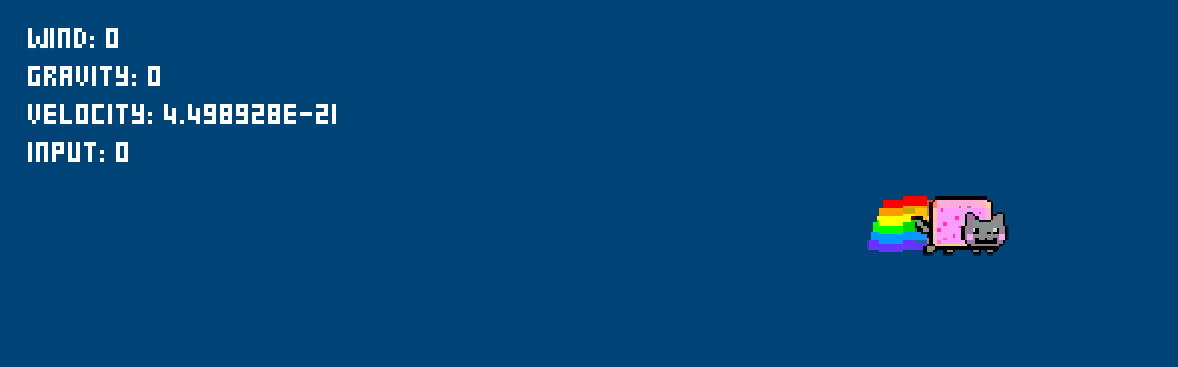
0.000000000000000000004498928Bringing Nyan Cat to a Complete Stop
The simplest way to bring Nyan Cat’s velocity to a complete halt is to round it to zero. Add your own chop function to perform this task:
...

function chop(v:Vector, tolerance:float) {
  var mag:float = magnitude(v);

  if (Mathf.Abs(mag) < tolerance) {
    v.x = 0;
    v.y = 0;
  }

  return v;
}

...
Mathf.Abs converts negative values to positive (absolute) values, and if the result falls beneath the tolerance parameter, a vector of (0, 0) is returned. Call the function in the Update function and set the tolerance to 0.01:
function Update () {
  ...
  velocity = add(velocity, friction);
  // halt if within 0.01 of zero
  velocity = chop(velocity, 0.01);

  ...
Save, test, and confirm that Nyan Cat is able to reach a complete stop at a sufficiently small velocity.
What’s Next?
Take a moment to play around with the force values using the Inspector, and perhaps consider a new float variable for your key input multiplier.
Part 3 concludes with the Unity’s built-in vector implementations.
Further Reading
Daniel Shiffman’s Nature of Code focuses on programming strategies and techniques for computer simulations of natural systems using the Processing programming language. It’s an excellent book, and a major inspiration for this post. It will take you far further and deeper into this subject matter, and if you’ve found the tutorial interesting thus far, I highly recommend you give it a read. You can buy it in print, or read it free online.
References
- https://khanacademy.org/math/precalculus/vectors-precalc
- http://natureofcode.com/book/chapter-1-vectors/
- http://natureofcode.com/book/chapter-2-forces/
- https://unity3d.com/learn/tutorials/topics/scripting/vector-maths
- Nyan Cat by PRguitarman