Firstly: this series looks at vectors as in physics, otherwise referred to as Euclidean vectors (and not scalable graphics). Unity includes built-in features for dealing with 2- and 3-dimensional vectors, but the purpose of this tutorial is to understand vector concepts and math from the bottom up. You’ll write your own 2D vector code from scratch, and once this is complete, take a look at what Unity offers pre-packaged.
If you are seeking a tutorial on nothing but Unity’s built-in vector features, there are better places to look. If you wish to fundamentally understand vectors, keep reading.
Introduction
To keep things as simple as possible, this tutorial makes use of UnityScript. Anyone familiar with the basics of Unity, and some programming language (be it JavaScript, Python, C#, or something similar) should grasp things just fine. To get started, all you’ll need is Unity, and:
- this Nyan Cat graphic;
- this font, named Wendy.
Creating a New Document
Begin by creating a new 2D project in Unity:

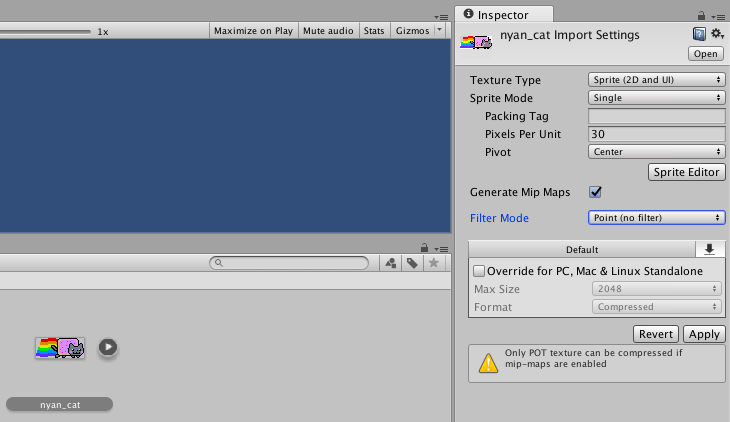
Import the nyan_cat.png graphic (you can do this by dragging the file into the Assets panel); then using the Inspector panel on the right, set the graphic’s Pixels per Unit to 30 and Filter Mode to Point. Click Apply when you’re done:
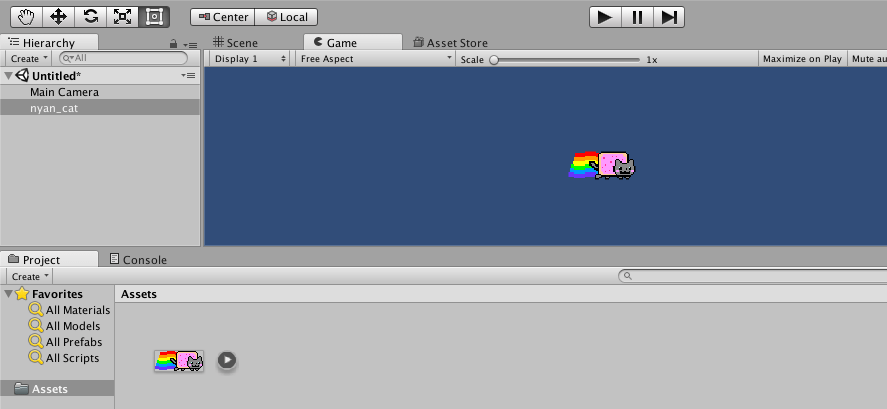
Now add (drag) nyan_cat to the Hierarchy panel (at the top-left).
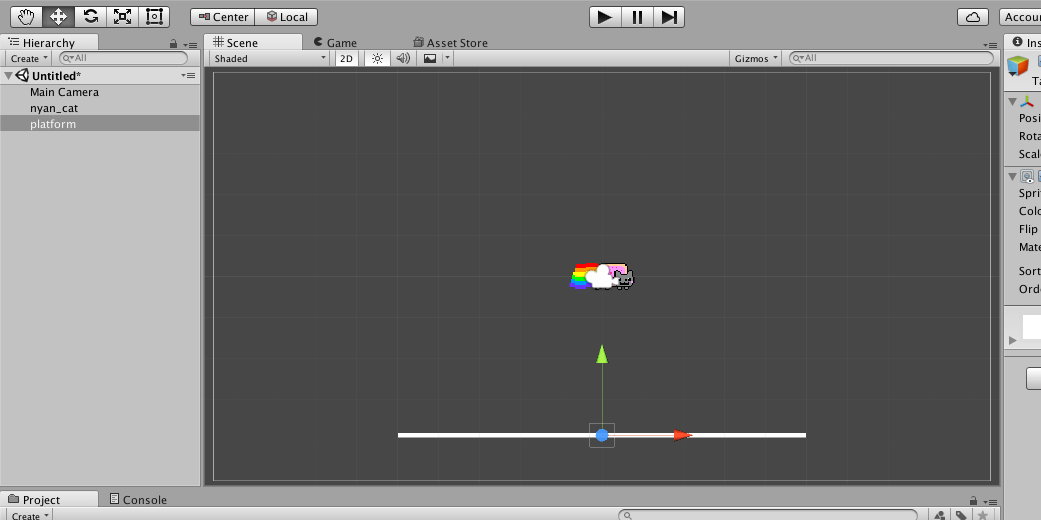
Create a new sprite by right-clicking in the Assets panel and selecting Create > Sprites > Square. Drag this new square into the Hierarchy panel and name the instance “platform”:

Scale and position the platform as per the screenshot below:
At this point you can test the scene (using the play button). You’ll find that Nyan Cat and the platform remain suspended, seemingly frozen in the positions you’ve placed them.
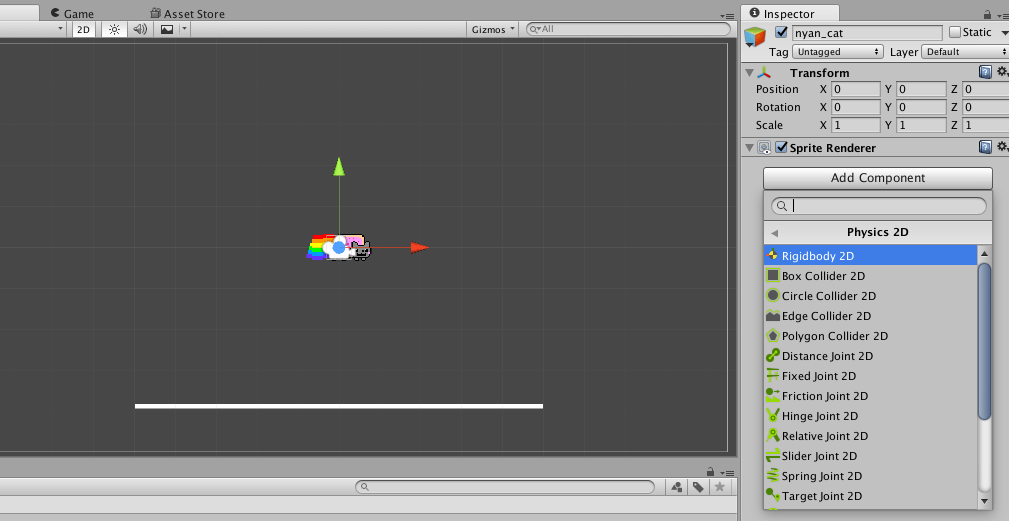
With your nyan_cat instance selected, using the Add Component button in the Inspector panel, select Physics 2D > Rigidbody 2D:
If you test/play the scene again, Nyan Cat will drop, falling straight through the platform. Now add a Rigidbody 2D to the platform, as well – but check/tick the Y and Z Constraints in the Rigidbody 2D’s parameters to prevent gravity pulling it down:

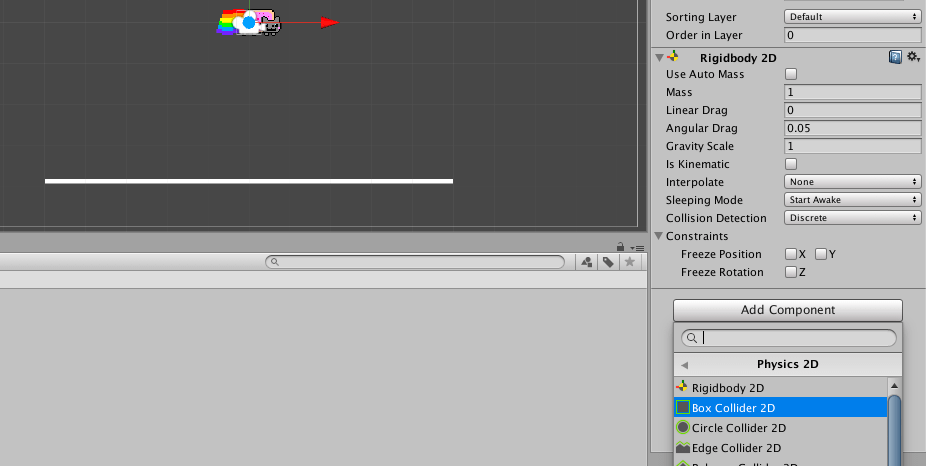
Finally, add a Box Collider 2D component (also found within Physics 2D) to both Nyan Cat and the platform so that they behave like ‘solid’ objects:
Play the scene. Because of the Box Colliders, Nyan Cat and the platform are are unable to pass through one another. Nyan Cat should drop and land/stop on the platform.
Adjusting the Scale for Easier Math
Before getting into the code and math stuff, it’s best to scale everything in order to make the numbers a bit more sane to work with. This step will allow you to avoid lengthy decimals in favour of single- and double-digit integers. You normally wouldn’t scale things so dramatically – which incurs some odd side-effects, as you’ll come to see – but understanding vectors will be easier using values like [1, 5] instead of [0.0025, 0.0125].
Make the necessary adjustments to the following objects in the Hierarchy:
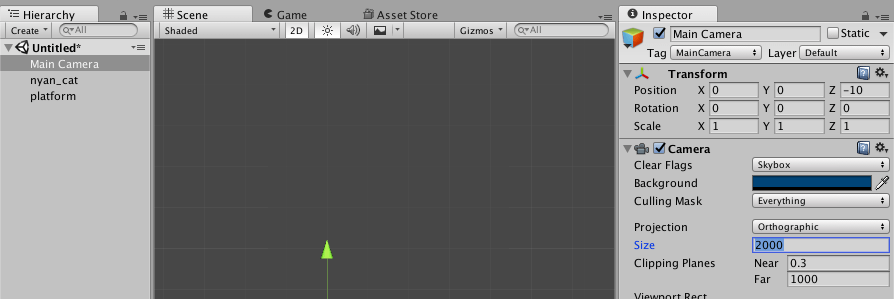
- “Main Camera” – in the Camera component, set the Background (Hex Colour) field to
00447700, and the Size field to2000
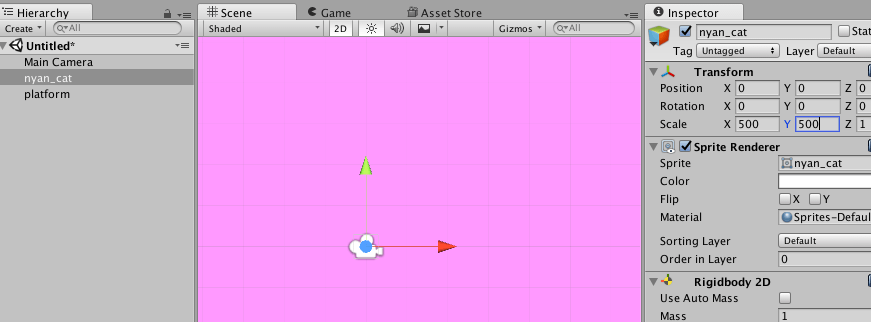
- “nyan_cat” – in the Transform component, set both the X and Y Scale to
500
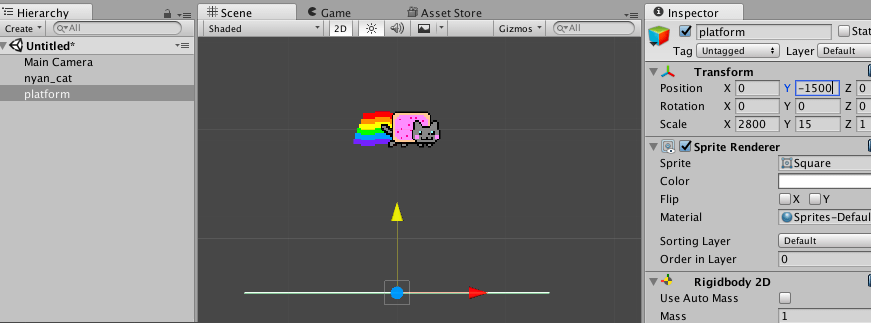
- “platform” – in the Transform component, set the X to Y Scale to
2800and15respectively. You’ll also need to reposition the platform using the Y Position value (around-1500will do):
If you play the scene now, it should look something like this:

However, everything appears to be moving far more slowly now, even though Nyan Cat is actually moving at the same speed as before. This is because (s)he is now 500 times larger – about 500 m3 in Unity physics! So, what was a cat falling a few meters, is something more like a massive meteor falling a few meters. In order to avoid your view being completely engulfed by Nyan Cat, you’re now viewing things from far further away, and as a result, everything appears to be moving slower … kind of like how an aeroplane high overhead crosses your field of view slower than a mobility scooter a few meters away.
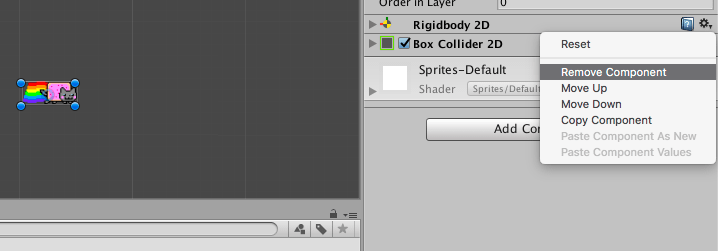
Remember, though, this scaling makes the math simpler, so it’s all relative and won’t actually make any difference when you start writing some code to replace Unity’s physics with your own; and on that point, the final step here’s to remove the Rigidbody 2D and Box Collider 2D components from both Nyan Cat and the platform. You can do this using the menu under the cog icon:
Adding Some Code
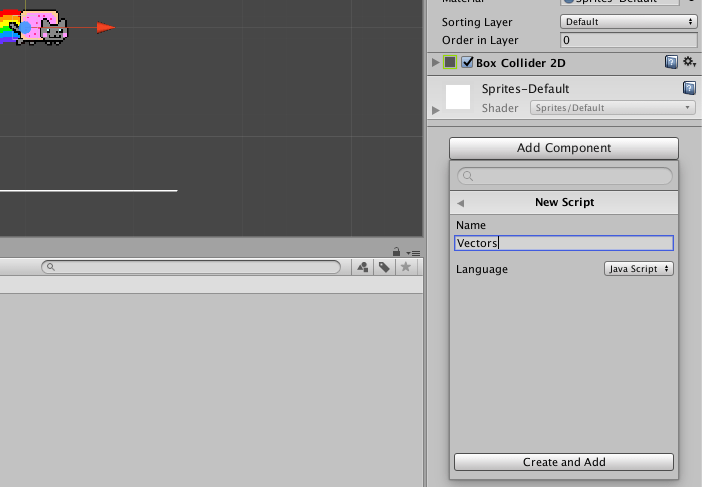
With the Unity physics components removed, it’s time to program your own. Using Add Component > New Script, add a new Java Script to Nyan Cat; name it “Vectors”:
Basic Movement and ‘Gravity’ – the Non-Vector Way
Begin by adding some simple code to your Vector scripts to pull Nyan Cat downward:
#pragma strict

var y:float = 0;
var YSpeed:float = -9.8;

function Update () {
  y += YSpeed;
  transform.position.y = y;
}
Test (play) to see if the code works. Now that Nyan Cat is falling, add some lateral movement using the same approach:
...
var x:float = 0;
var y:float = 0;
var XSpeed:float = 5;
var YSpeed:float = -9.8;
function Update () {
x += XSpeed;
transform.position.x = x;
y += YSpeed;
transform.position.y = y;
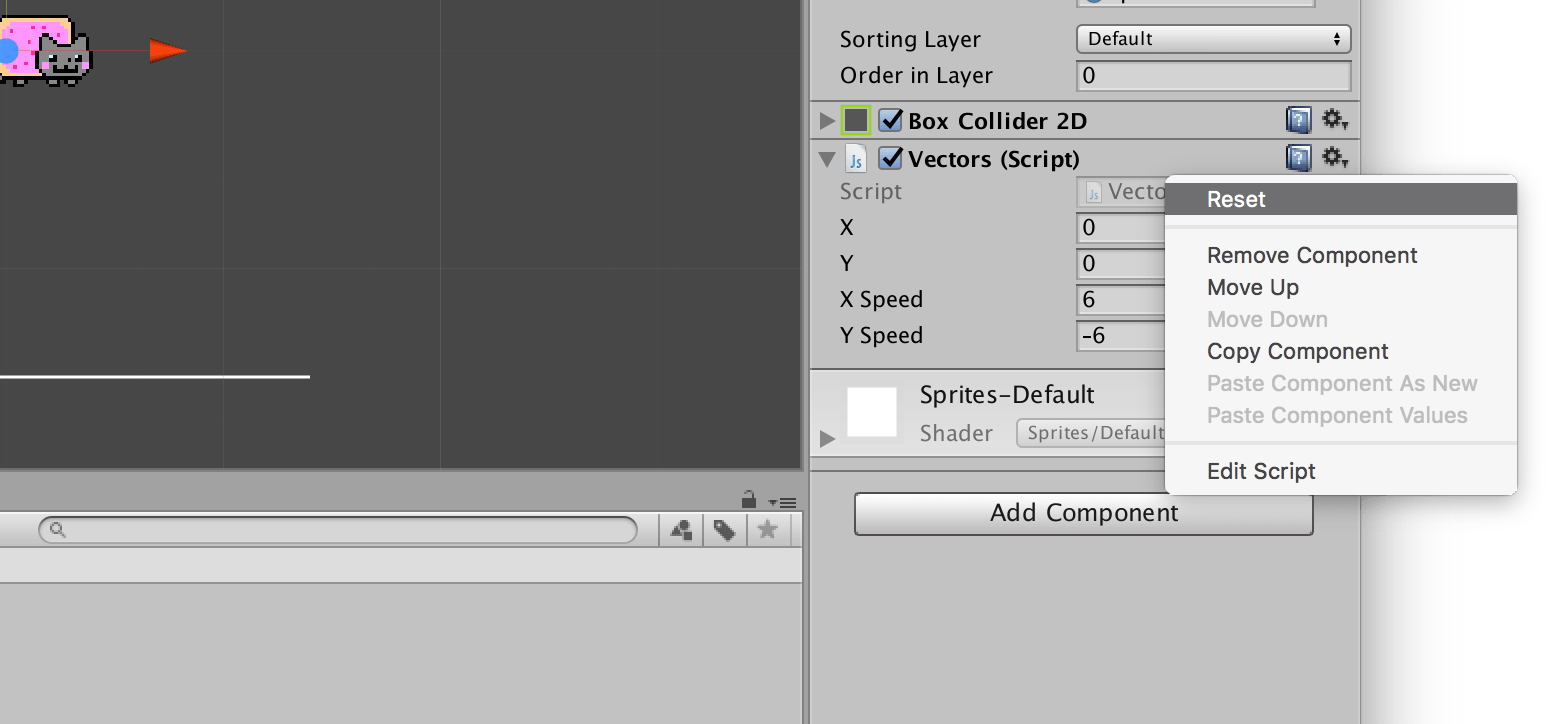
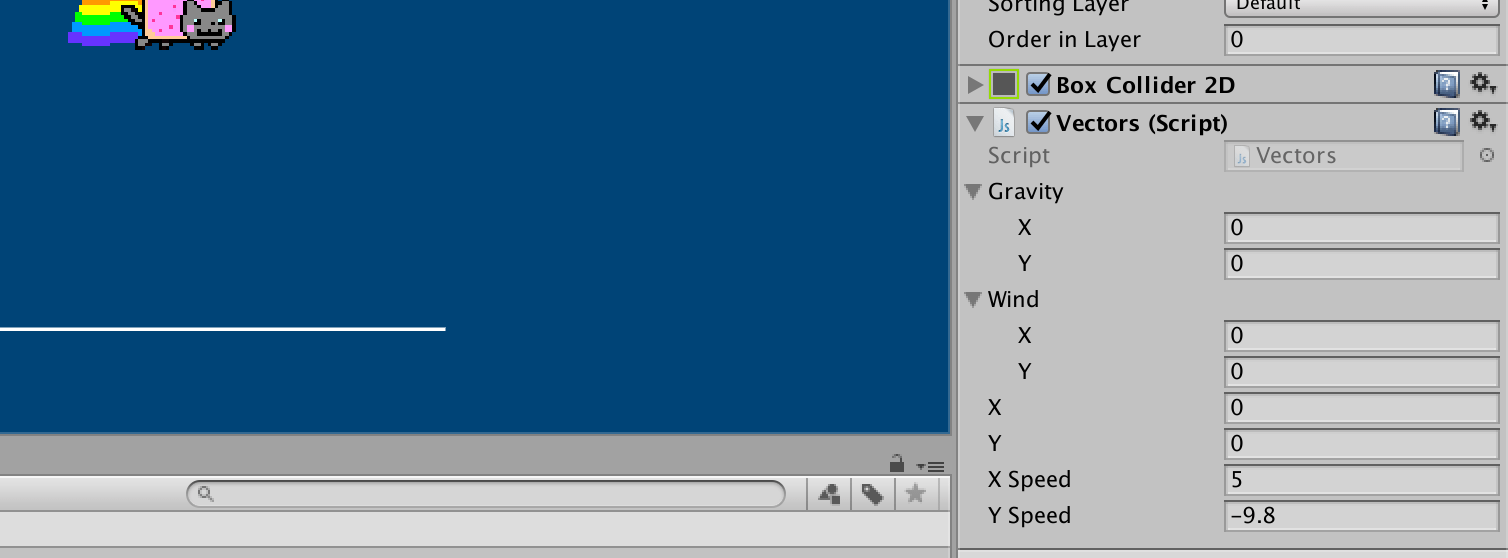
}You can experiment with the X/Y Speed values, but rather than editing variables in the code, use the Inspector as it allows you edit and monitor variables (even during play). To revert to the values defined in your code, use the Reset option under the cog menu:
Adding the HUD
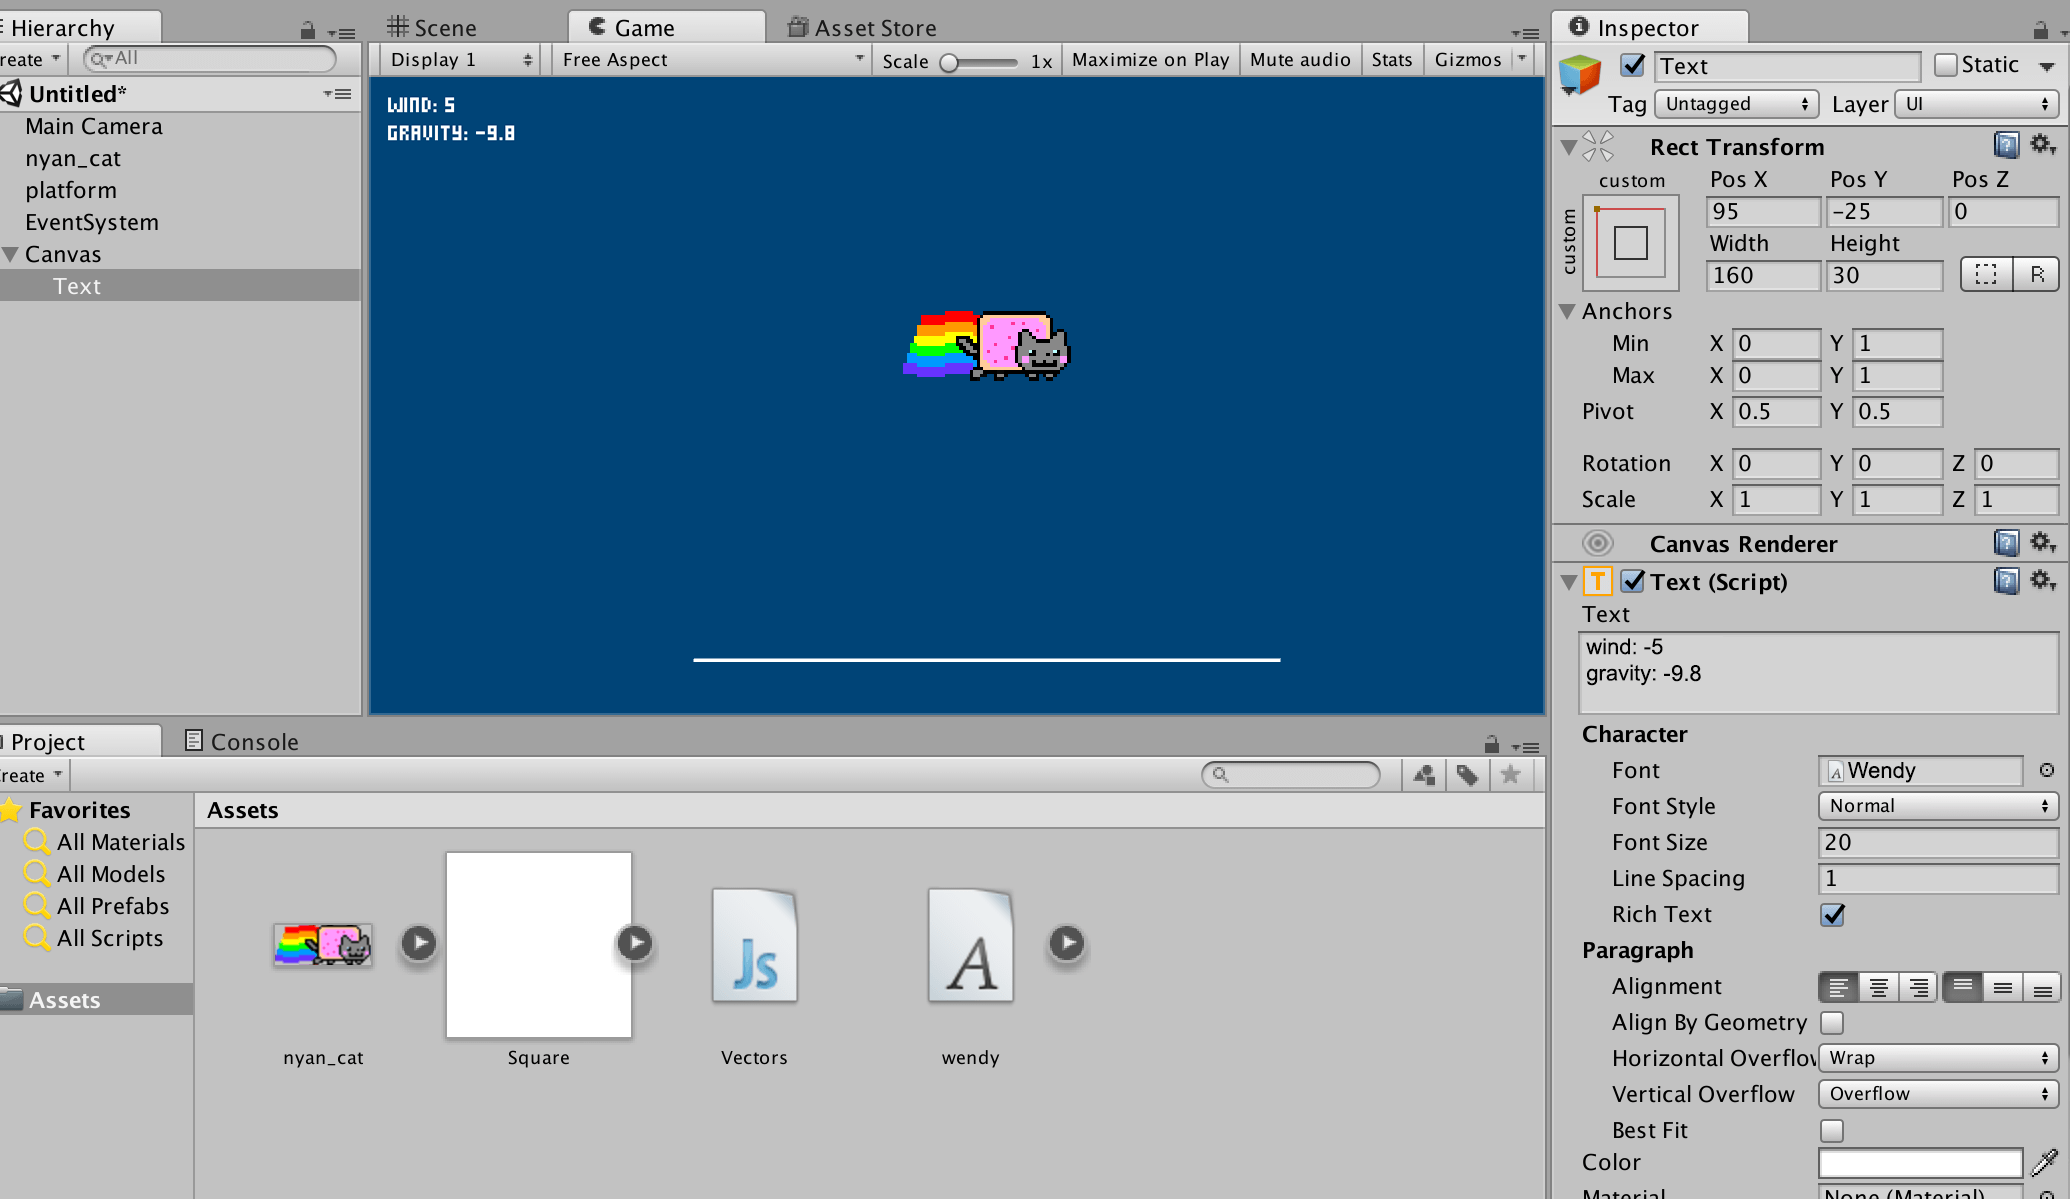
While you can watch the Inspector to track any variable values, a Heads-Up Display adds a nice touch. Add the Wendy font file to your Assets. You can simply drag it into Unity. Then, from the menu bar, select GameObject > UI > Text to create a new Text component. Now, using the Inspector:
- enter into the Text field:
wind: 5, and on a new line,gravity: -9.8 - set the Font to
Wendy, Font Size to20, Vertical Overflow toOverflow, and Color to white - then adjust width/height/PosX/PosY under Rect Transform to place the HUD at top-left
In time you’ll control the HUD output dynamically, but for now the HUD text will display the same numbers, regardless of your variable values. The next step is to rewrite the code using a vector approach.
Vectors – The Fundamentals
According to Wikipedia, a Euclidean vector is “used to represent physical quantities that have both magnitude and direction”. That’s a succinct and accurate description, but to make things clearer, consider this illustration:

Nyan Cat has moved from position A to B, covering a distance of 10 units in the process. This distance can be referred to as a magnitude. It’s a scalar value that represents quantity of 10 units. Here’s the thing, though: the magnitude gives no indication of which direction Nyan Cat has travelled, you just know that it’s rightward from what you’ve gleaned visually.
Scalars represent a single value, but vectors represent multiple values – and are thus able to represent both a magnitude and direction. Consider this example:

This example can be expressed as a vector using the following notation:
Note how an arrow is placed above the letter (a v in this case) to indicate it’s a vector quantity. You can perform various types of arithmetic using vectors. For example, addition operations are calculated by adding the horizontal and vertical values of each vector:
Therefore, vector c is equal to (10, 4):

(4, 1) + (6, 3) = (10, 4)Using this vector you can determine that the direction is up- and (more heavily so) right-ward. Moreover, you can use the Pythagorean Theorem to calculate the magnitude. In Excel formula notation – which is easier to express on a web-page – the magnitude calculation in this instance would be:
SQRT( (10)^2 + (4)^2 )
which equals 10.77.
These vector concepts can now be applied using programming code.
Coding Movement Using Vectors
Currently, there are 2 forces in effect in this simulation: one lateral (wind); one vertical (gravity). Create a new Vector class at the top of your script for dealing with vector forces:
#pragma strict

class Vector {
  var x:float = 0;
  var y:float = 0;
}

...
If you’re unfamiliar with classes, think of them as a data type of your own definition and design. There are a number of data types with which you should already be familiar, such as float, int, or String. With this new class, you’ve created your own Vector data type, which allows you to declare your gravity and wind vectors:
#pragma strict
class Vector {
var x:float = 0;
var y:float = 0;
}
var gravity:Vector;
var wind:Vector;
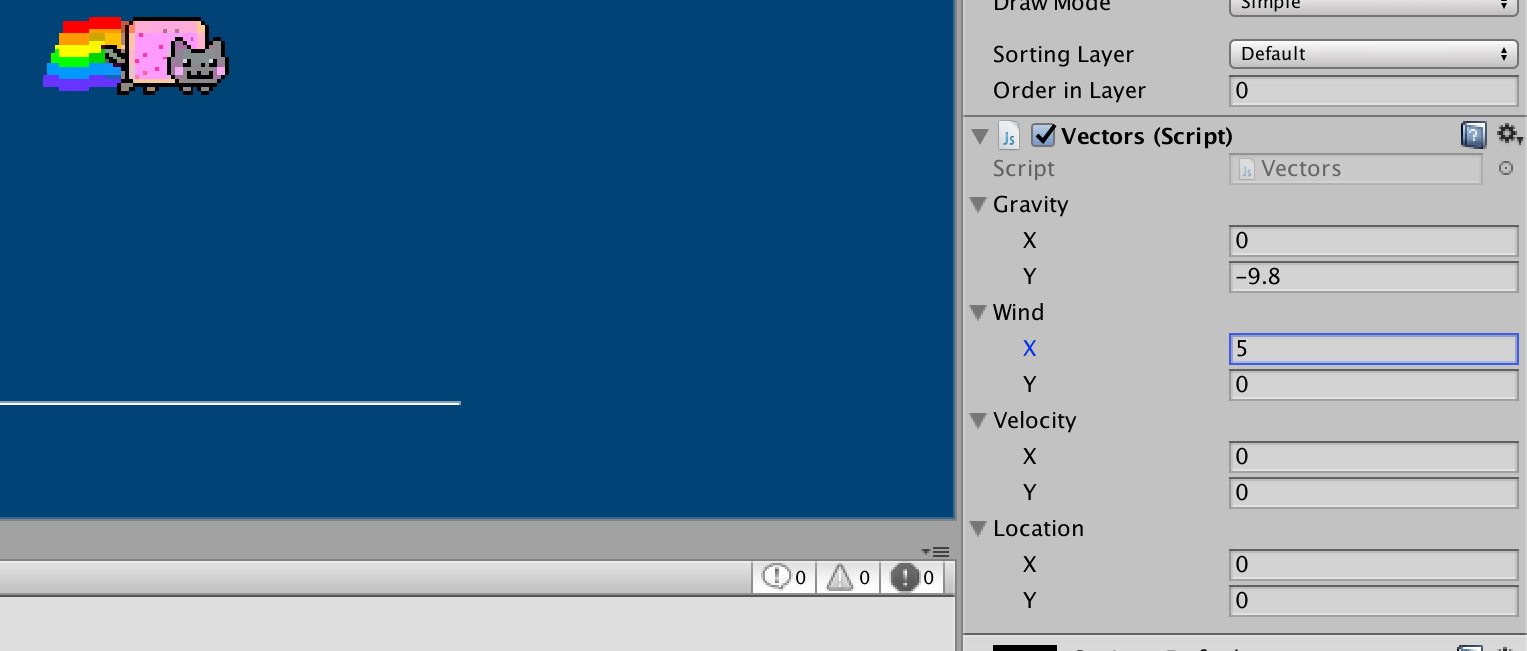
...Your new vector variables will appear in the Inspector panel, with each comprising of an X and Y value:
These new Gravity and Wind variables, of course, have no effect on Nyan Cat’s movement, as this is still controlled using the original variables. Replace them with a new velocity (to which you’ll soon add the various forces acting on Nyan cat) and location vectors:
...

// replace this
//var x:float = 0;
//var y:float = 0;
//var XSpeed:float = 0;
//var YSpeed:float = 0;

// with this
var location:Vector;
var velocity:Vector;

...
To combine the effects of these forces, create a new function for adding vectors:
...
var velocity:Vector;

function add(v1:Vector, v2:Vector) {
  var result = new Vector();
  result.x = v1.x + v2.x;
  result.y = v1.y + v2.y;
  return result;
}

...
In mathematical notation, you’ll now use this function to perform the following arithmetic (where v is velocity, g is gravity, and w is wind):
However, this must occur with each new frame, so the Update function must be overhauled to include the add function, which in turn computes the values of the velocity and location variables:
...

function Update () {
  velocity = add(gravity, wind);
  location = add(location, velocity);
  transform.position.x = location.x;
  transform.position.y = location.y;
}
The result, I’m sure you’ll agree, is something far more intelligible: the first two lines of the Update function express that the current location is equal to the previous frame’s location + the velocity (which itself can be a combination of any number of forces); and the last lines two place Nyan Cat according to the updated location coordinates.
Calibrate your new Gravity and Wind variables using the Inspector, then test the result:
More Vector Arithmetic
Vectors can not only be added, but also subtracted, multiplied, and divided.
Subtracting Vectors
Consider a scenario where Nyan Cat and nayN Cat are cruising together through space, both propelled along a vector of (7, 2). However, something’s gone awry with nayN’s rainbow propulsion drive, and as a result, nayN’s vector is (10, -2). To compensate, the drive can be re-calibrated to take nayN’s offset into account. This offset is equal to the difference between the desired and current vectors – and like finding the difference between any scalar values, this can be calculated using subtraction:

Nyan Cat's vector = (7, 2)
nyaN Cat's vector = (10, -2)
offset = Nyan Cat - nyaN Cat
∴ offset = (7, 2) - (10, -2)
Therefore, nayN’s drive needs to be re-calibrated using an adjustment vector of (-3, 4). Gauging by the solid grey, arrow-capped line in the illustration above, one can confirm this is correct.
As subtraction is the opposite of addition, you can create a subtract function by copy & pasting the existing add function, renaming it subtract, and switching any + signs to - signs:
...

function subtract(v1:Vector, v2:Vector) {
  var result = new Vector();
  result.x = v1.x - v2.x;
  result.y = v1.y - v2.y;
  return result;
}

...
Multiplying Vectors
You probably understand multiplication as a series of additions, and the same is true for vector multiplication:

(3, 2) × 3 is equal to (3, 2) + (3, 2) + (3, 2)Add this multiply function to your code (note how both the x and y values are multiplied by the same float value):
...

function multiply(v:Vector, f:float) {
  var result = new Vector();
  result.x = v.x * f;
  result.y = v.y * f;
  return result;
}

...
Dividing Vectors
A divide function is not essential, as you could perform a division operation using a decimal fraction and your multiply function – for example:
multiply(gravity, 0.5) // divide by 2
However, a designated divide function should make your code easier to read, so it’s best to add one. Simply copy & paste the existing multiply function, rename it divide, and then switch the * signs to / signs.
Adding Key Input
Key input will translate into a force, which as you now know, is best represented as a vector. Add a new input variable and modify your Update function accordingly:
...
var input:Vector;
...

function Update () {
  input.x = Input.GetAxis('Horizontal');
  input.y = Input.GetAxis('Vertical');
  input = multiply(input, 12);

  velocity = add(gravity, wind);
  velocity = add(velocity, input);

  location = add(location, velocity);
  transform.position.x = location.x;
  transform.position.y = location.y;
}
To give the key input more power, each axis value is multiplied by 12. Input.GetAxis returns a value between 1 and -1, meaning that the maximum horizontal or vertical thrust generated from key input is 12 (or -12) units. This stated, there’s still a way Nyan Cat’s input thrust can exceed 12 …
Vector Magnitude
While holding the right key, Nyan Cat’s input vector is (12, 0). But, consider that while holding both right and up, it’s (12, 12). This means that Nyan Cat is pushed 12 units both horizontally and vertically, meaning (s)he is able travel faster diagonally:

Before limiting the input force to 12 in every direction, it’s best to add a function for measuring magnitude (the length of a vector). This, effectively, is a code implementation of the same Pythagorean Theorem used in the illustration above:
...

function magnitude(v:Vector) {
  var result:float = Mathf.Sqrt((v.x * v.x) + (v.y * v.y));
  return result;
}

...
Now using this new magnitude function, add a Debug.Log to log the input magnitude:
...
function Update () {
input.x = Input.GetAxis('Horizontal');
input.y = Input.GetAxis('Vertical');
input = multiply(input, 12);
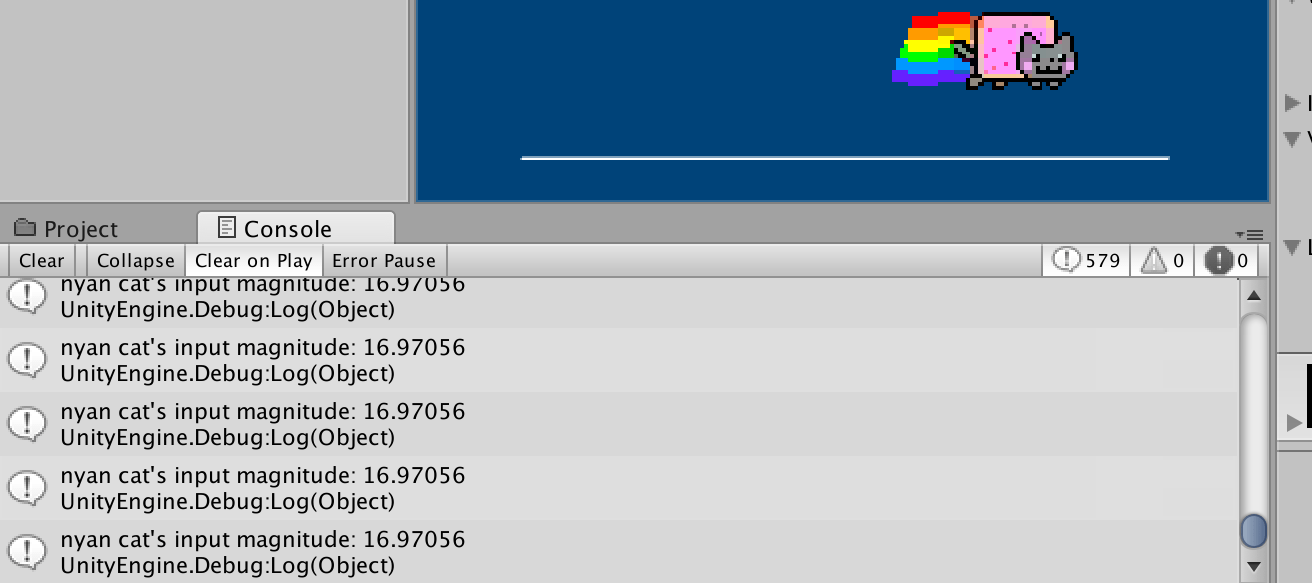
Debug.Log("nyan cat's input magnitude: " + magnitude(input));
...Save your code, test, and observe the Console output. Note how the input magnitude can reach ~16.97 with diagonal input, yet never exceeds 12 with directly vertical or horizontal input:
Restricting the magnitude to 12 in every direction requires normalizing the vector first, but this (and much more) has been left for part 2 of this tutorial.
Part 2
The second (and penultimate) of these tutorials covers normalizing vectors, dynamic HUD read-outs, and coding additional physics (acceleration & friction). Part 3 concludes with the Unity’s built-in vector implementations.
Proceed to part 2.
References
- https://khanacademy.org/math/precalculus/vectors-precalc
- http://natureofcode.com/book/chapter-1-vectors/
- http://natureofcode.com/book/chapter-2-forces/
- https://unity3d.com/learn/tutorials/topics/scripting/vector-maths
- Nyan Cat by PRguitarman