« 7.4: Collision Detection |
8.1: Functions »
ControlP5
ControlP5 is a feature-packed GUI library, full of options for building and customising user interfaces. It provides an extensive set of control widgets that include buttons, sliders, knobs, toggles, textfields, checkboxes, accordions, charts, timers, drop-downs, tab- and window-interfaces, and more.
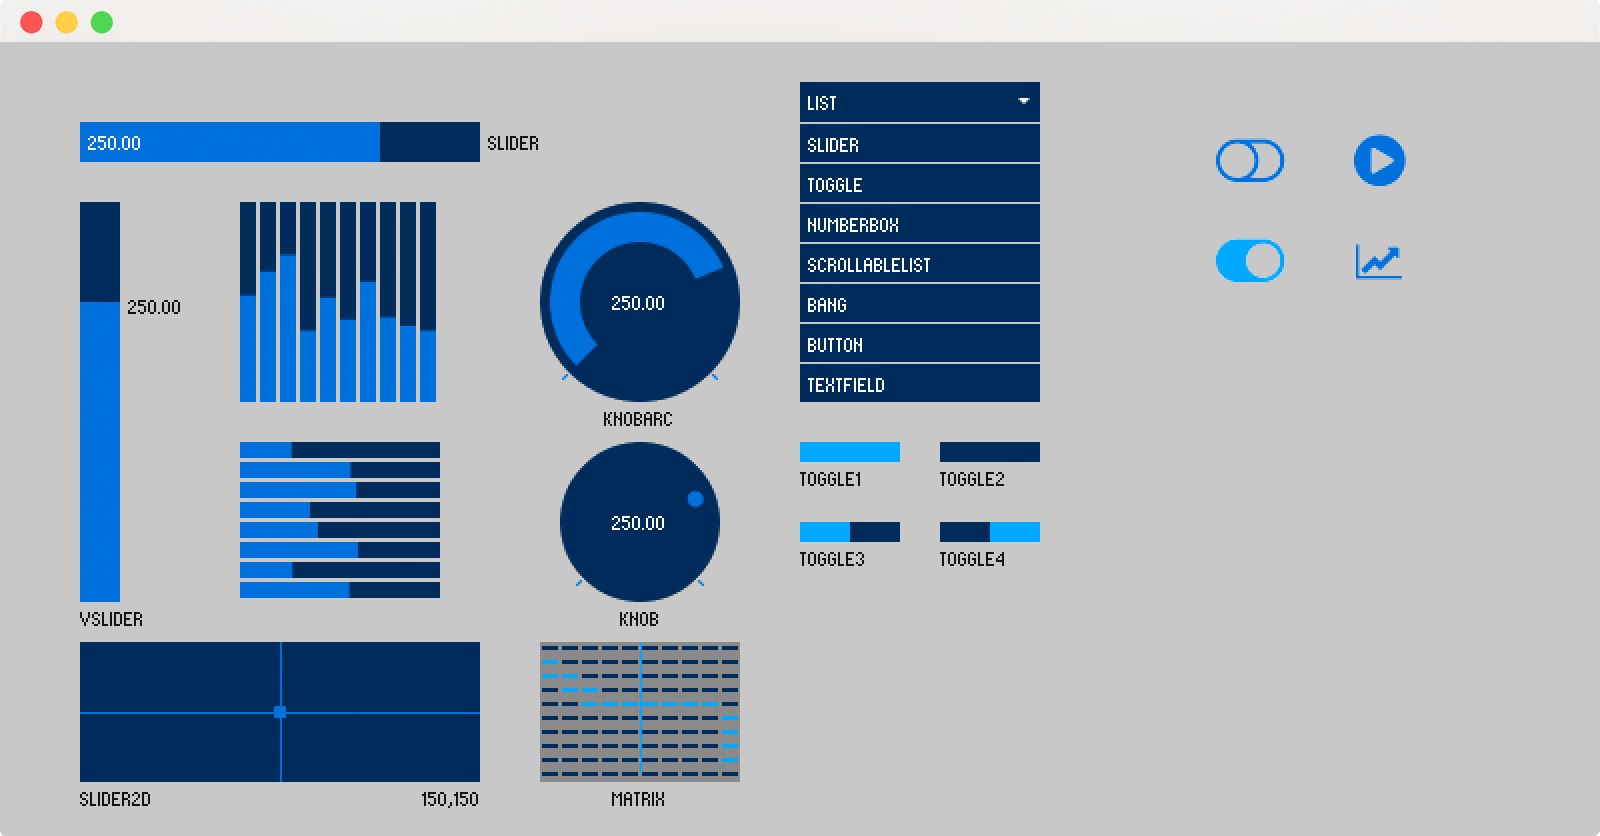
Andreas Schlegel [Copyright], via Github
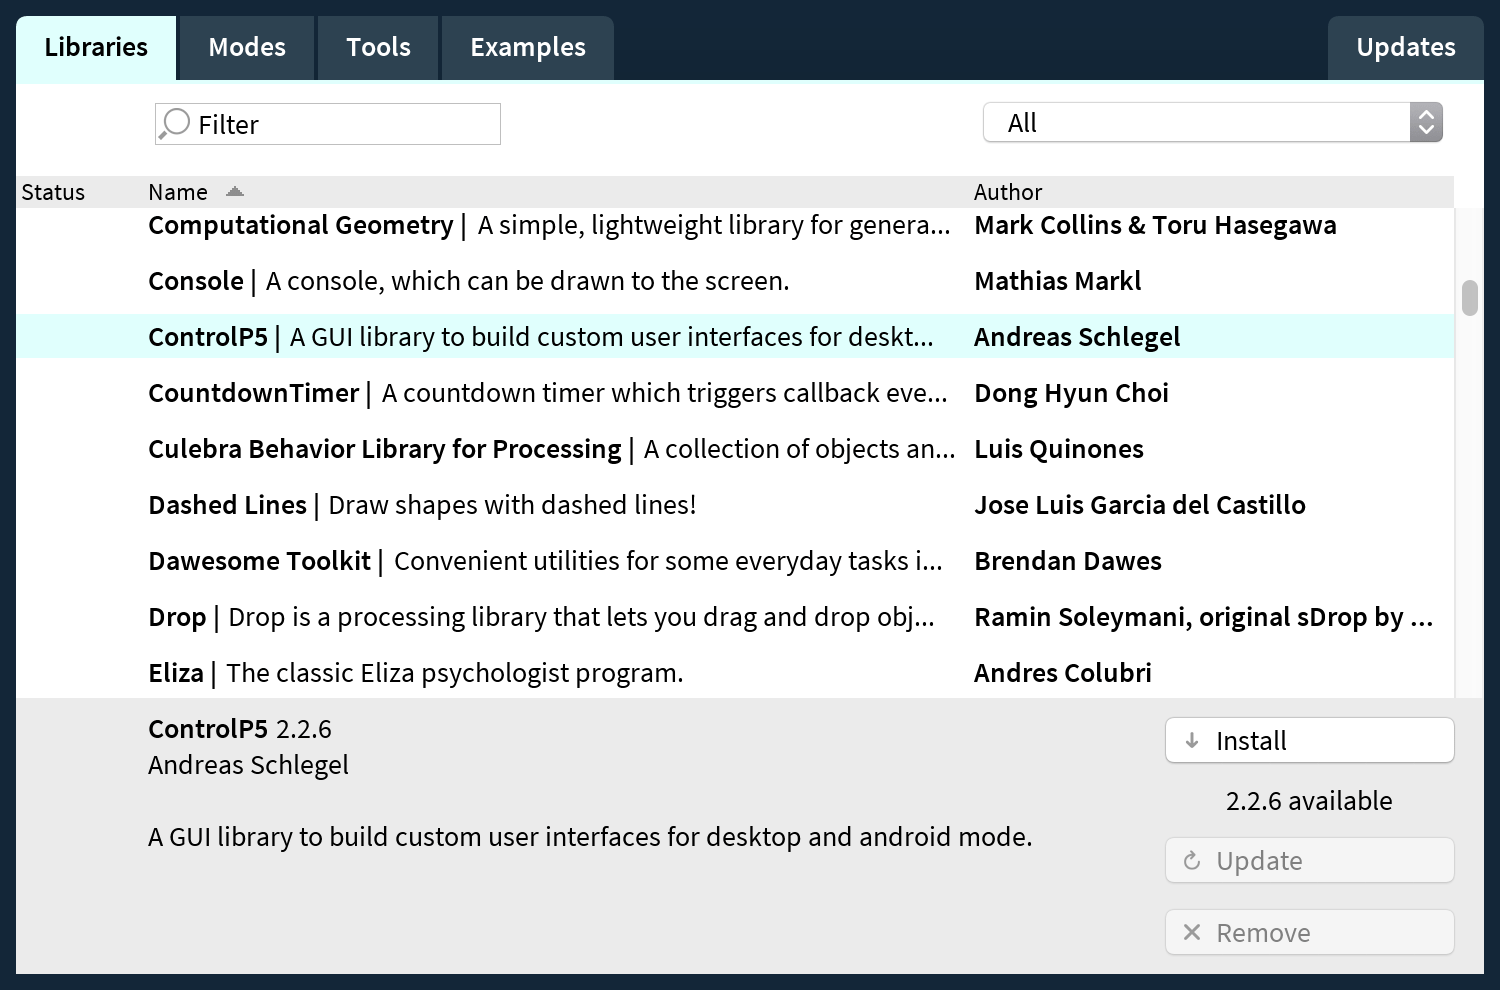
To begin using ControlP5, one must first install it. From the Processing menu bar, select Sketch > Import Library… > Add Library…
This raises the Contribution Manager window; under the Libraries tab, locate and install ControlP5.
Once you’ve the library installed, create a new sketch named “identikit”. An identikit – or facial composite – is a portrait image reconstructed from the memory of one or many eyewitnesses. You’ve probably seen criminal identikits in police stations or on the news. These are rendered in various ways, namely: by sketch artists; or using a system of overlaid transparencies; or with computer software. Our identikit program will be no use for any real-world application, but fun to play with, nonetheless. To get started, add the following code.
add_library('controlP5')

def setup():
    size(720,485)
    global cp5
    cp5 = ControlP5(this)

def draw():
    background('#004477')
    stroke('#FFFFFF')
    strokeWeight(3)
    axis = 250

    # face
    noFill()
    ellipse(axis,220, 370,370)
Processing requires the add_library() line for loading in ControlP5. In the setup block, a new ControlP5 instance is assigned to a variable named cp5. From here on, one can access ContolP5 features with a cp5. prefix; this will make sense a little further along when we begin to add controllers. The axis coordinate runs through the centre of the ellipse; in other words, it marks the horizontal centre of the circular ‘face’. The face is positioned to the left of the display to make room for control widgets on the right.

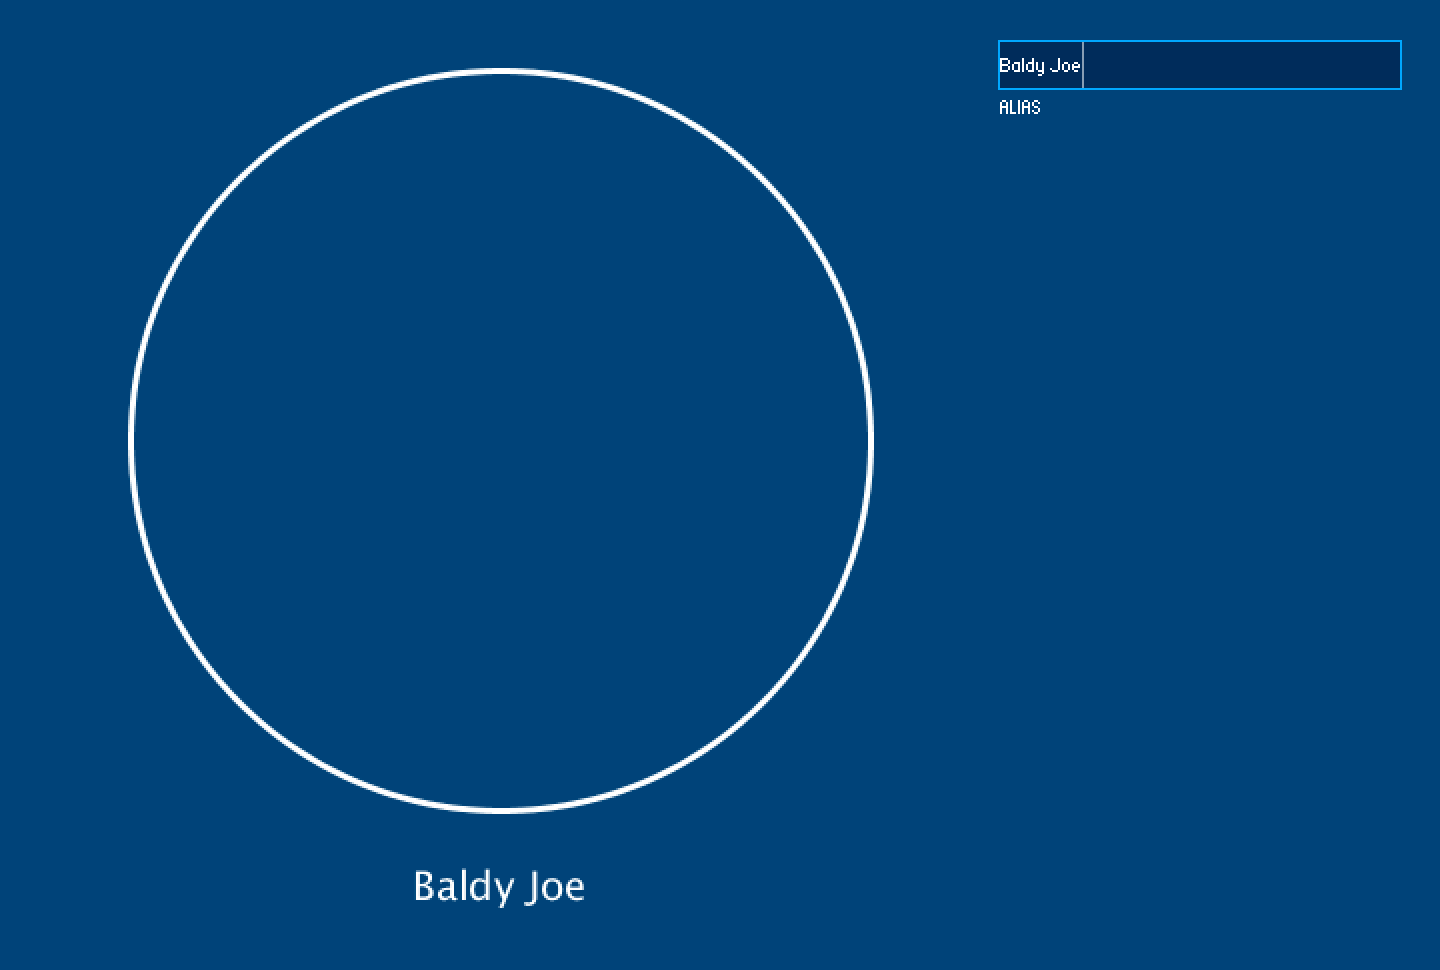
The first widget will be a textfield. The controller is added to the setup function.
def setup():
    ...
    (cp5.addTextfield('alias')
        .setPosition(500,20)
        .setSize(200,25)
    )
The brackets surrounding the cp5.addTextfield() lines may look odd, but this is necessary to break the chain of methods over multiple lines. Alternatively, you could write this all on a single line but likely won’t find it as readable. Whenever you create a new controller, specify a name in the first argument – in this case, I have used 'alias'. This name is used to reference the controller further along and also serves as the default label for the field.
In the draw function, retrieve the captured input and render it using a text() function. You use the getController() method to access the properties of any cp5 controller (by its name), and chain a getText() onto this to isolate the text value.
def draw():
    ...
    # alias
    fill('#FFFFFF')
    textSize(20)
    textAlign(CENTER)
    alias = cp5.getController('alias').getText()
    text(alias, axis,450)
    noFill()
Test out the input field. The alias you enter will appear beneath the face.
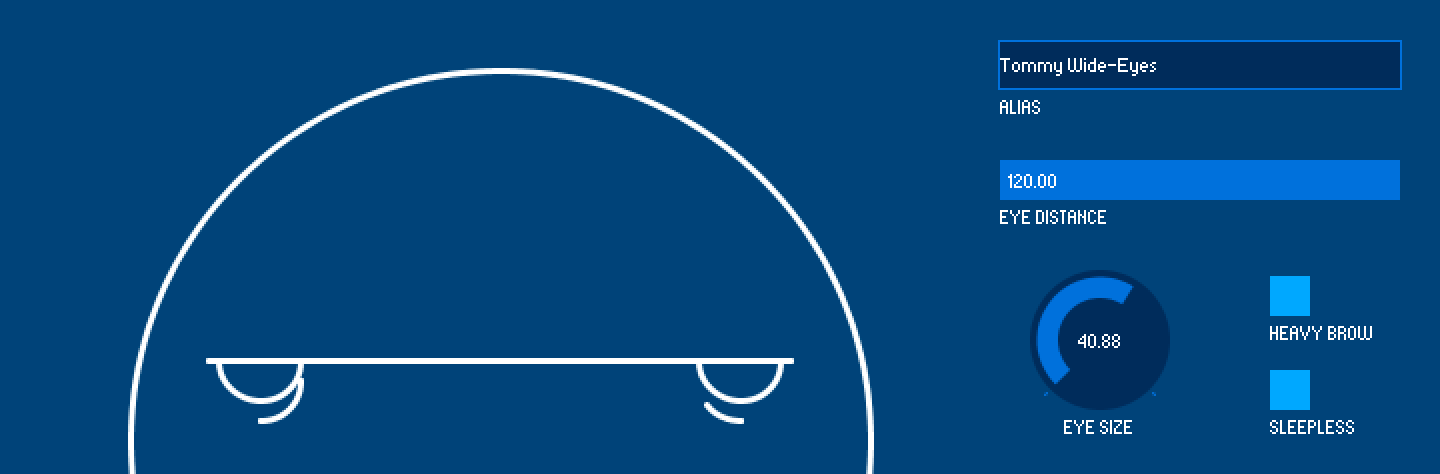
Next, we’ll add widgets for controlling the eyes. The additional methods, setRange() and setValue(), set the lower/upper value range and in the initial value, respectively.
def setup():
    ...
    (cp5.addSlider('eye distance')
        .setPosition(500,80)
        .setSize(200,20)
        .setRange(30,120)
        .setValue(80)
    )
The problem is that the default position for any slider label is to the right of the widget, which doesn’t fit nicely in this layout. Add some code that adjusts the alignment and padding to reposition the label at the bottom left.
        ...
        .setValue(80)
    )
    (cp5.getController('eye distance')
        .getCaptionLabel()
        .align(ControlP5.LEFT, ControlP5.BOTTOM_OUTSIDE)
        .setPaddingX(0)
    )
Before drawing the eyes on the face, add three more control widgets – a knob and two toggles:
def setup():
    ...
    (cp5.addKnob('eye size')
        .setPosition(515,135)
        .setRadius(35)
        .setRange(10,60)
        .setValue(50)
    )

    (cp5.addToggle('heavy brow')
        .setPosition(635,138)
        .setSize(20,20)
    )

    (cp5.addToggle('sleepless')
        .setPosition(635,185)
        .setSize(20,20)
    )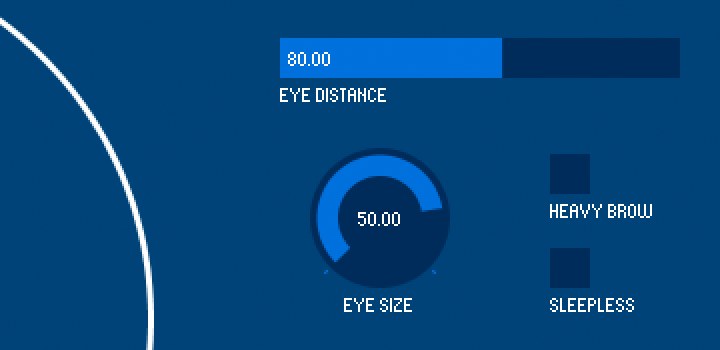
To draw the eyes, add the following lines to your draw function. You’ll notice that a getController() is used to retrieve each of the controller properties – but, unlike the textfield – there are getValue() methods in place of getText().
def draw():
    ...
    # eyes
    eyedistance = cp5.getController('eye distance').getValue()
    eyesize = cp5.getController('eye size').getValue()
    ellipse(axis-eyedistance,180, eyesize,eyesize)
    ellipse(axis+eyedistance,180, eyesize,eyesize)

    if cp5.getController('heavy brow').getValue():
        fill('#004477'); stroke('#004477')
        rect(100,180-eyesize/2, 300,eyesize/2)
        stroke('#FFFFFF')
        line(
          axis-eyedistance-eyesize/2-5, 180,
          axis+eyedistance+eyesize/2+5, 180
        )

    if cp5.getController('sleepless').getValue():
        noFill()
        arc(axis-eyedistance,190, eyesize,eyesize, 0,HALF_PI)
        arc(axis+eyedistance,190, eyesize,eyesize, HALF_PI,2.5)
        fill('#004477')
Run the sketch a have a play with the various eye features.
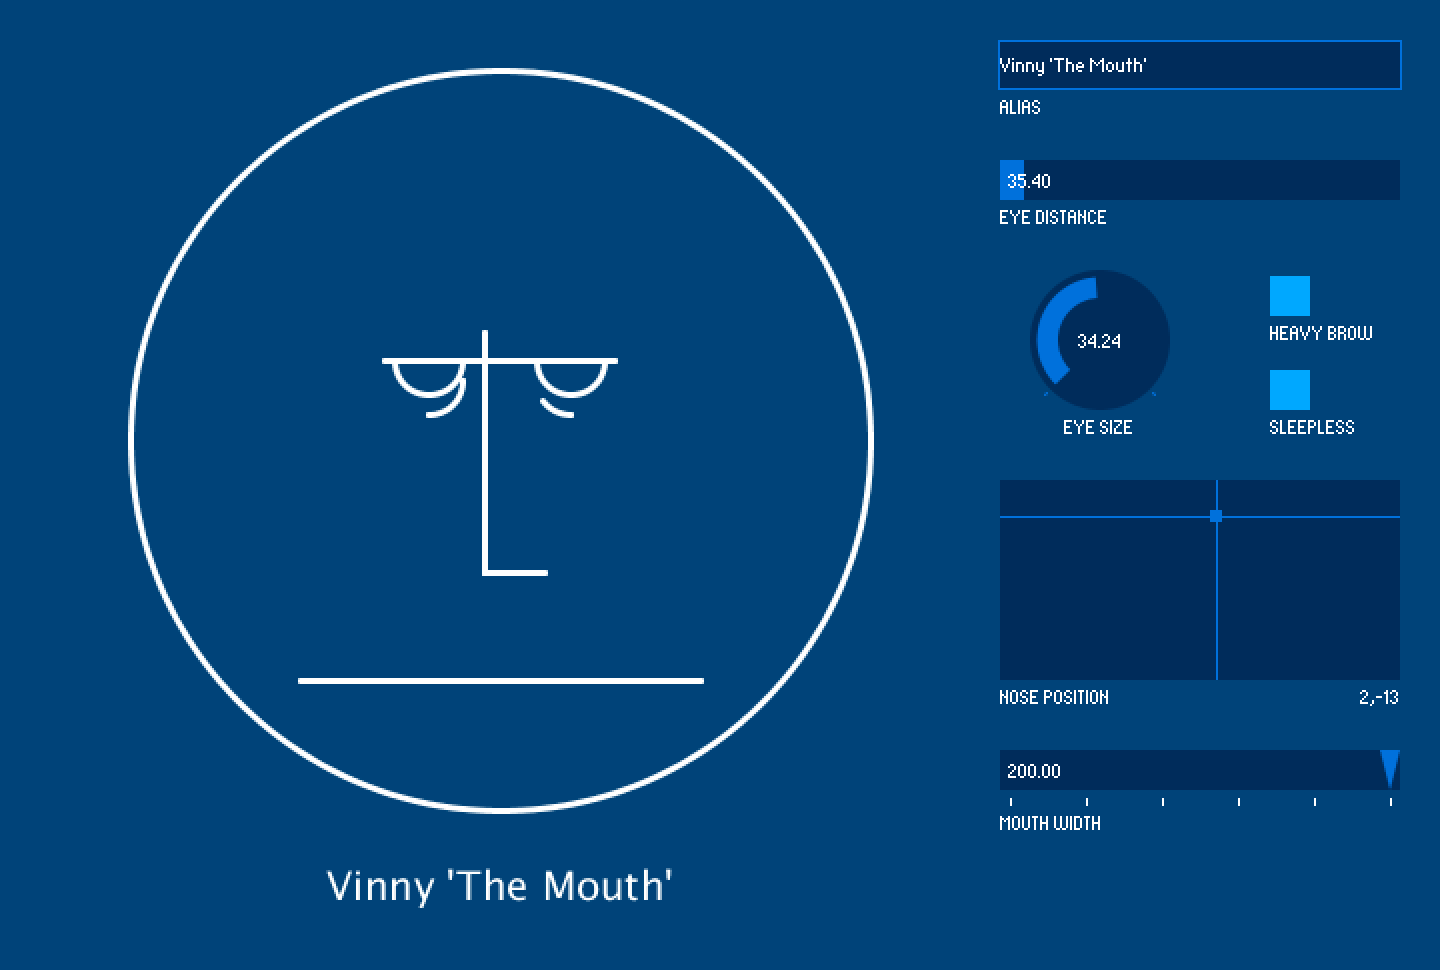
For the nose, we’ll add a 2D slider; for the mouth, a standard slider but with tick marks for set increments.
def setup():
    ...
    (cp5.addSlider2D('nose position')
        .setPosition(500,240)
        .setSize(200,100)
        .setMinMax(-30,-20,30,20)
        .setValue(0,0)
    )

    (cp5.addSlider('mouth width')
        .setPosition(500,375)
        .setSize(200,20)
        .setRange(10,200)
        .setValue(124)
        .setNumberOfTickMarks(6)
        .setSliderMode(Slider.FLEXIBLE)
    )
    (cp5.getController('mouth width')
        .getCaptionLabel()
        .align(ControlP5.LEFT, ControlP5.BOTTOM_OUTSIDE)
        .setPaddingX(0)
        .setPaddingY(12)
    )

def draw():
    ...
    # nose
    noseposition = cp5.getController('nose position')
    nosex = noseposition.getArrayValue()[0]
    nosey = noseposition.getArrayValue()[1]
    line(axis-10+nosex,180+nosey, axis-10+nosex,300+nosey)
    line(axis-10+nosex,300+nosey, axis-10+nosex+30,300+nosey)

    # mouth
    mouthwidth = cp5.getController('mouth width').getValue()
    line(axis-mouthwidth/2,340, axis+mouthwidth/2,340)
The 2D slider holds two values in a list, hence the .getArrayValue() white square brackets. If you are confused about what the different methods control, try adjusting the arguments to see what effect this has.
We’ll add one final button widget that will save the image as a TIFF file. Using the .addButton() method, place a new button at the lower right of the display window.
(cp5.addButton('save image')
    .setPosition(500,440)
    .setSize(200,25)
)
One can attach event handlers like any other method. These require a Python lambda – but for now, all you need to know is where to write the lambda. We’ll not review lambdas in these lessons, but if you wish to explore them further, wait until after lesson 8 on functions (they’ll make far more sense, after that).
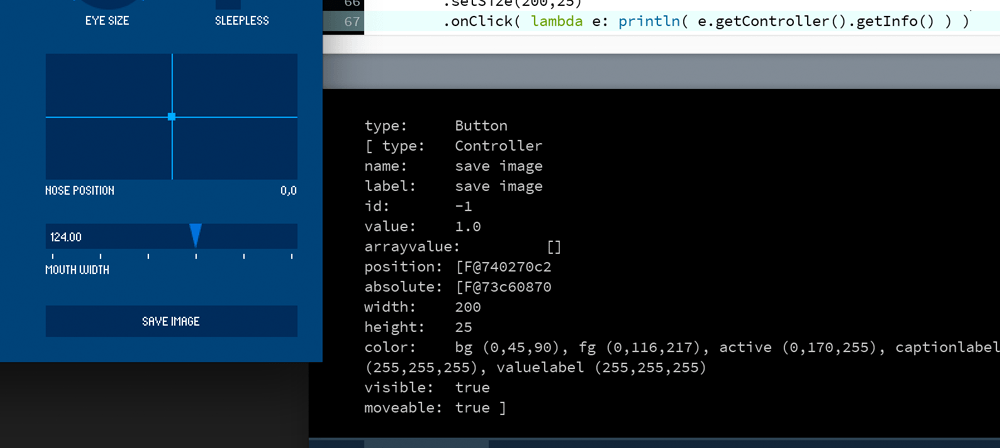
(cp5.addButton('save image')
    .setPosition(500,440)
    .setSize(200,25)
    .onClick( lambda e: println(e.getController().getInfo()) )
)
The e variable serves the same role as in the mouse event examples from earlierThat’s, it holds all of the properties related to the event (in this case, an .onClick). You may also name e whatever you wish. To provide some insight into what these properties are, we’ll print them to the console.
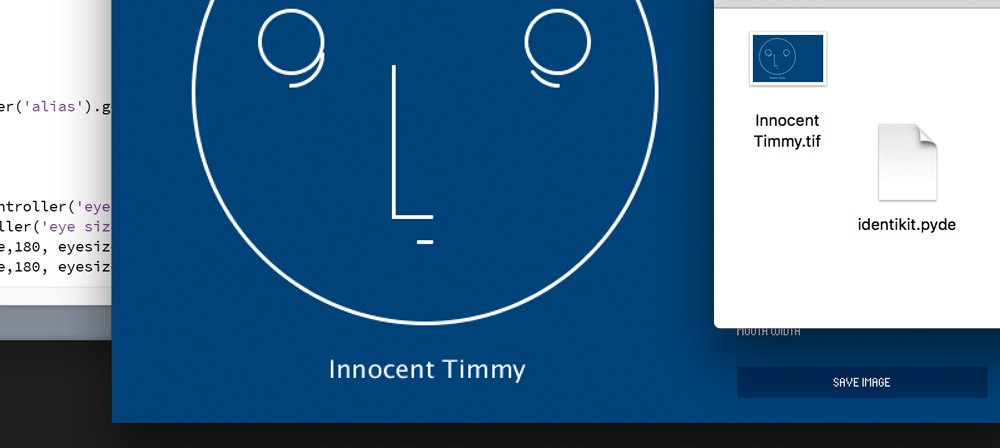
Of course, we wish to save an image, so change the lambda line, replacing everything after the colon with a save() function that uses the alias input for a filename.
.onClick( lambda e: save(cp5.getController('alias').getText()) )
that’s as far as we’ll venture into ControlP5. There’s plenty more to explore, though. For instance, while pressing the Alt key and click-and-dragging, controllers can be moved about the display. You can also hide all of the controllers using Alt+Shift+H. To activate these shortcut features, add a cp5.enableShortcuts() line somewhere in the setup block.
def setup():
...
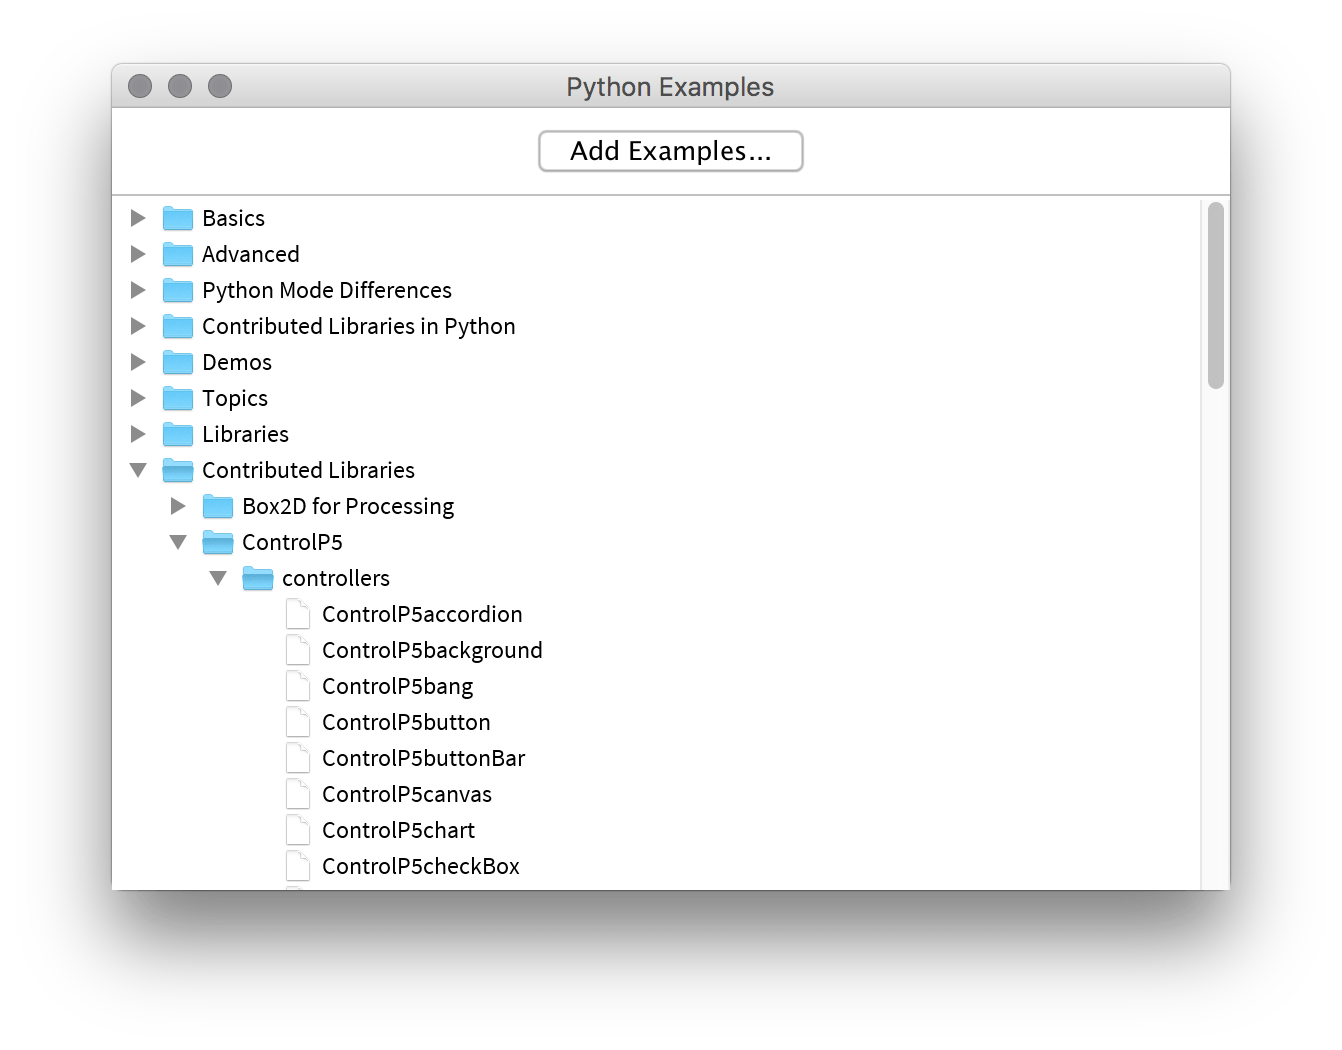
cp5.enableShortcuts()For more examples of how to use ControlP5, refer to the File > Examples… menu. In the window that pops-up, you’ll find an extensive selection of sample sketches. Be warned though: almost all of these are written in Processing’s Java language. In spite of this, it should be similar enough for you to understand and translate to Python.
That’s all for this lesson. Feel welcome to experiment with and add additional features to the tasks you’ve completed.
Lesson 8
You’ll often find that you repeat the same, or very similar, lines of code within a single sketch. Moreover, as your programs grow more complex, repetition tends to creep in. For more modular and reusable code, one can employ functions. In the next chapter, you’ll look at how to define and work with functions. As a concept, you should grasp functions without much trouble, especially considering what you managed thus far. On the other hand, I’ll still be throwing in some crunchy tasks to keep you challenged!
8.1: Functions »
Complete list of Processing.py lessons
References
- http://www.designinginteractions.com/
- http://www.sojamo.de/libraries/controlP5
- https://developer.mozilla.org/en-US/docs/Games/Techniques/2D_collision_detection
- https://www.interaction-design.org/literature/book/the-encyclopedia-of-human-computer-interaction-2nd-ed/human-computer-interaction-brief-intro