« 6.5: Filters and Blends |
7.1: User Interfaces »
Tint and Transparency
Processing’s tint() function tints images using a specified colour. This is like taking a sheet of colour transparency film and placing it over a given image. It’s simple enough to use and best explained with few code snippets.
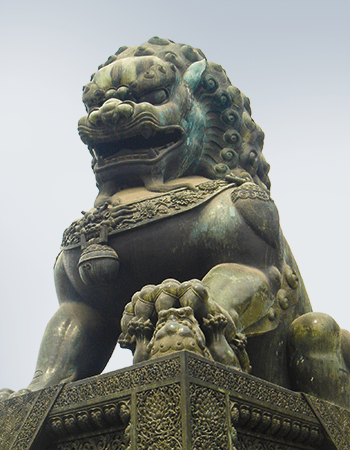
Create a new sketch and save it as “tints”. Download this guardian lion photograph (Forbidden City, Beijing) and place it your sketch’s “data” sub-directory.
Setup the sketch with the following code:
size(1050,500)
background('#004477')
noStroke()
img = loadImage('guardian-lion.png')
image(img, 0,0)Tang Zu-Ming [Public domain], via Wikimedia Commons
The tint function accepts three 0–255 (RGB) values as arguments.
tint(255,153,0)
image(img, width/3,0)
Alternatively, you could use a single argument of the color() data type:
#tint(255,153,0)
orange = color(255,153,0)
tint(orange)
image(img, width/3,0)
Run the code to confirm that the tint is working.
The tint function can accept a fourth 0–255 argument for transparency (alpha). Create a new orange50 variable, with an opacity of 50%, then add a new tint line followed by a second instance of the image.
orange50 = color(255,153,0, 128) # 255 ÷ 2 ≈ 128
tint(orange50)
image(img, width/3*2,0)If you need to affect the image transparency but retain the colour, use a white tint and your desired alpha value. Once you’ve set a tint it remains in effect for any further images, unless you include a subsequent tint() line or a noTint().
If you are wondering to yourself, “this looks a lot like a multiply blend mode”, you’d be correct. The effect can be replicated manually by using the loop arrangements from the “blend_modes” exercises. This would entail an additional alpha argument in the colorMode() function and some adapted loop code. For example:
colorMode(RGB, 1,1,1,1)

...

    layer1 = get(x,y)
    r = red(orange50) * red(layer1)
    g = green(orange50) * green(layer1)
    b = blue(orange50) * blue(layer1)
    a = alpha(orange50)
    fill( color(r,g,b,a) )
    rect(x+width/3*2, y, 1, 1)
The alpha() function is used to separate out an alpha channel from a color value.
Lesson 7
That concludes another lesson. You now understand how to manage colour on a channel and bit-level, and have gained insights into how popular image formats work along the way.
In lesson 7, you’ll look at interactivity in Processing. As you’ll see, Processing is great for mouse, keyboard, and other interaction, but rather clumsy for building user interfaces. If you’ve any experience with programming interfaces in other languages (perhaps some JavaScript, etc.), you’ll quickly realise what I mean. However, some useful Processing libraries provide an extended set of turnkey GUI features.
7.1: User Interfaces »
Complete list of Processing.py lessons
References
- http://setosa.io/ev/image-kernels/
- https://medium.freecodecamp.org/best-image-format-for-web-in-2019-jpeg-webp-heic-avif-41ba0c1b2789
- https://en.wikipedia.org/wiki/Blend_modes
- https://en.wikipedia.org/wiki/Kernel_(image_processing)