« 1.1: Intro to Processing |
1.3: Drawing »
Colour
There are various ways to specify colour in Processing. To keep things simple, we’ll stick with hexadecimal values for the first tutorial. If you are familiar with graphics software like Adobe Photoshop, Illustrator, Inkscape, or Gimp, you’ll have seen these values in your colour mixer. Processing includes its own colour selector. To access this, select Tools > Color Selector…
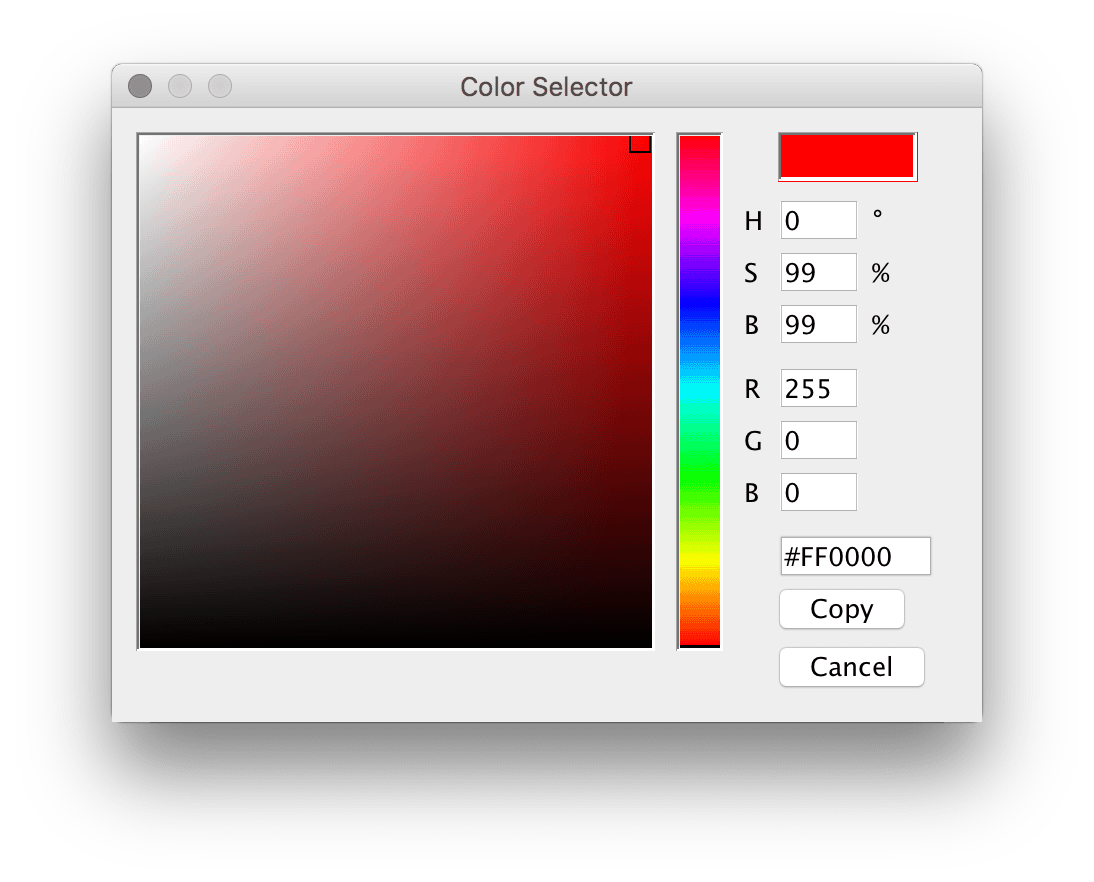
#.Screens rely on three primaries to mix colours, namely red, green, and blue. A hexadecimal colour value is comprised of 6 hexadecimal digits (0,1,2 … E,F) and can be split into three pairs. Each pair corresponds to a primary colour. In the case of red:
#FF0000
– the FF represents red; the middle 00 green; and right-most 00 blue. For reasons I won’t get into here, FF is the equivalent of 100%. Also, remember that you are mixing light, so #FFFFFF is white, and #000000 is black.
The fill() function sets the colour used to fill shapes. It accommodates up to four arguments, depending on the colour system you are using. For hexadecimal use the 6-digit value prefixed with a # and wrap it in quotes:
...

fill('#FF0000')
To see the fill colour in effect, add a rectangle. The rect() function is used to draw rectangles (or squares) and takes four arguments:
rect(x_coordinate, y_coordinate, width, height)
The x-coordinate values begin at the left-edge of the display window; and the y-coordinate from the top edge. Add the following code to your “hello_world” sketch; then run it to confirm that the output matches the image below:
...

fill('#FF0000')
rect(100, 150, 200, 300)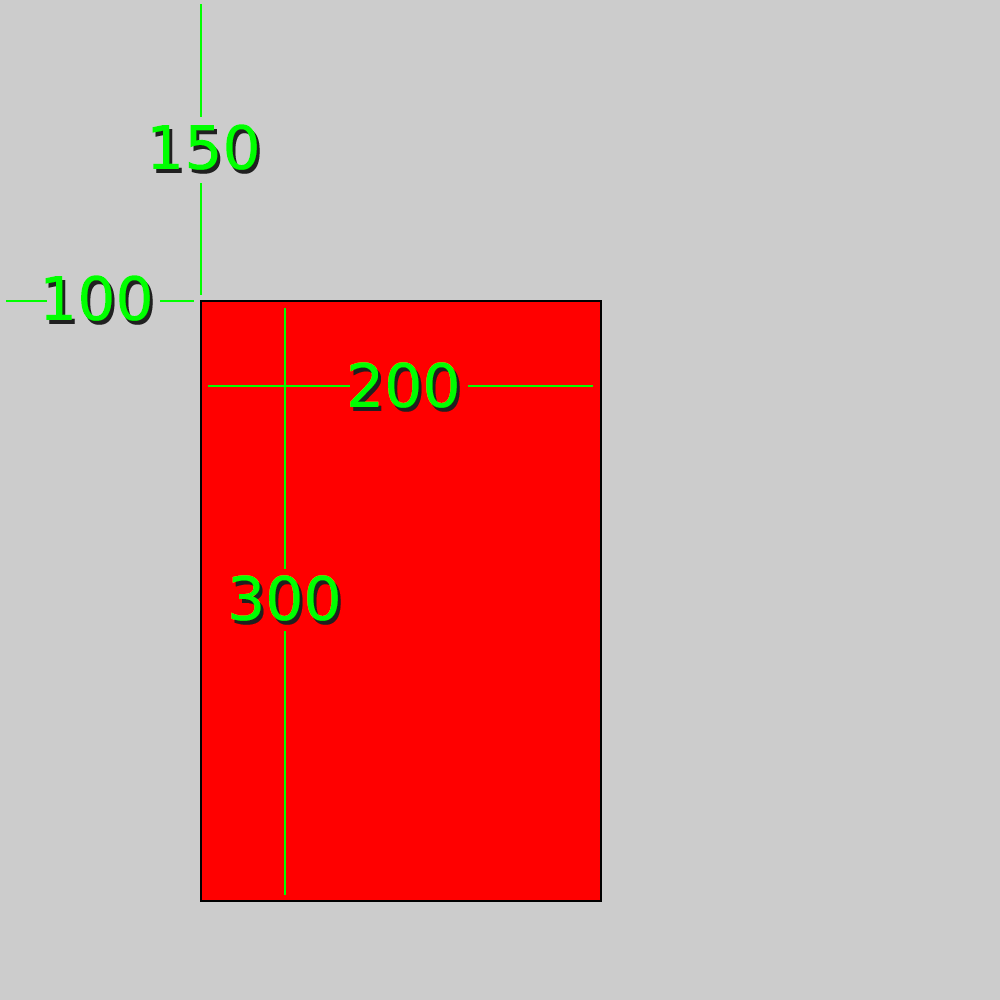
rect()'s four measurements/arguments. Note that top-left corner of the rectangle is placed at the x/y coordinate.Processing’s rect() is one of its many drawing functions. You’ll be introduced to some others soon.
Fills and Strokes
When you write a fill() function, every shape after that’s filled in the specified colour – that’s, up until the next fill() line. If you want to disable the fill altogether, use noFill(). In this way, Processing is like painting: you grab a brush and dip it in some paint, then everything you paint is influenced by the brush and colour you last selected. When you wish to paint in a different style or colour, you simply change-out your brush or dip it in a different pot.
Add the following code to your “hello_world” file. Note that comments have been added to give you a better idea of what each chunk is doing:
...

# red rectangles
fill('#FF0000')
rect(100,150, 200,300)
rect(10,15, 20,30)

# orange square
fill('#FF9900')
rect(50,100, 150,150)

# fill-less square
noFill()
rect(250,100, 150,150)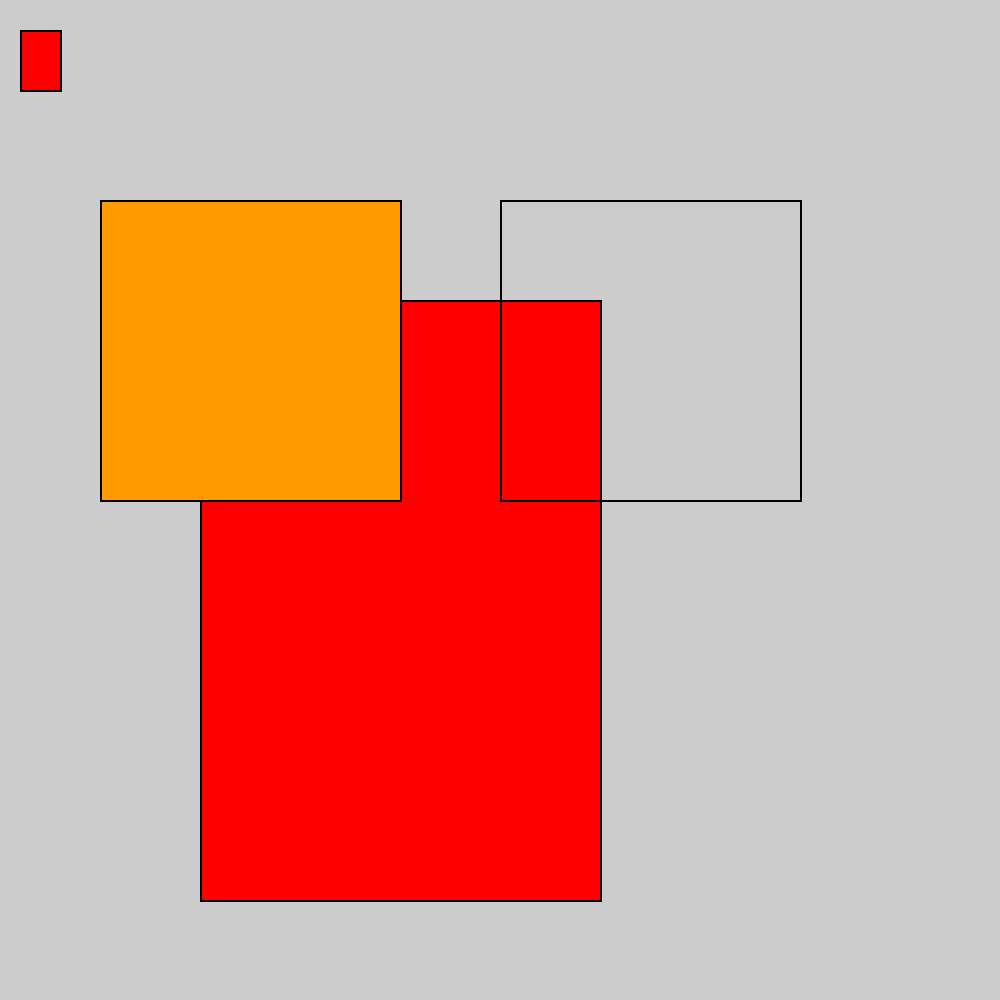
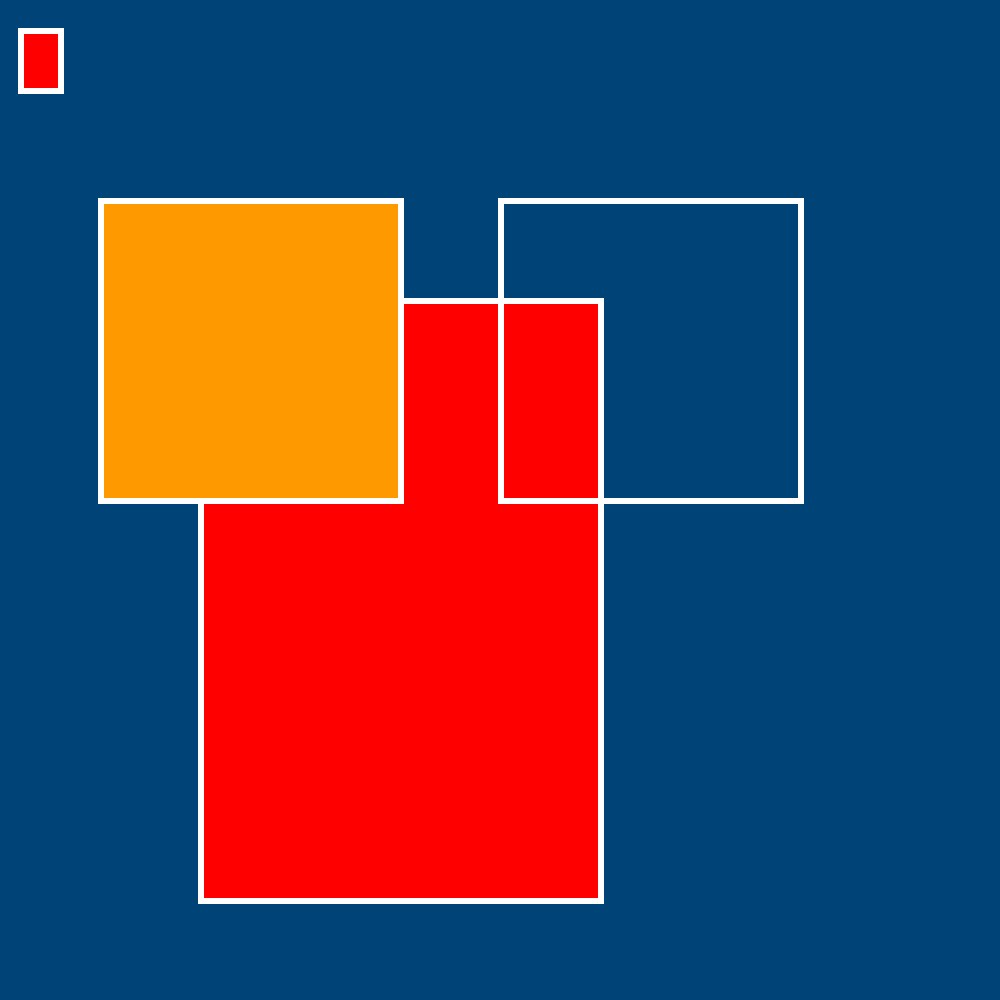
“Stroke” is another term for “outline”. There are three stroke functions you are likely to make frequent use of: stroke() to change the colour; strokeWeight() to change the width; and noStroke() to disable the stroke altogether. Like fill() and noFill(), the stroke functions affect everything below them. For a white stroke, three-pixels in width, add the following code (above the existing shapes):
...

stroke('#FFFFFF')
strokeWeight(3)

# red rectangles
fill('#FF0000')
...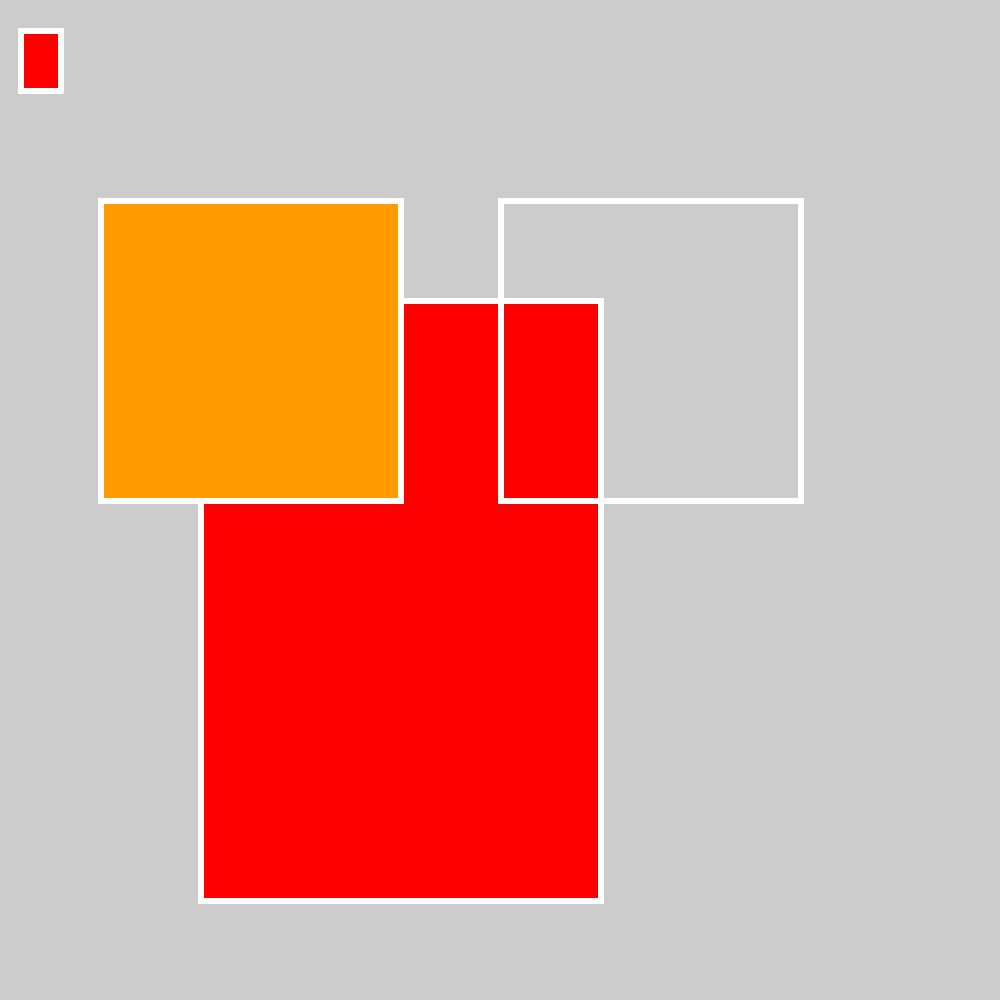
rect() lines affects everything you've drawn.To specify if stroke corners and tips should rounded or sharp, consult the relevant reference entries: strokeCap() and strokeJoin()
Background
To change the background colour use the background() function. Add a background line to the end of your sketch:
...
rect(250,100, 150,150)

background('#004477')
Run the sketch and notice how everything has disappeared and the whole display window is a flat shade of blue. This because the background('#004477') draws over everything before it. This is useful for when you get to animation, but for now, ensure that you place your background function somewhere near the top of your code:
...
size(500, 500)
background('#004477')

...
Colour Mode
You’ve been using hexadecimal values to represent colour thus far. We’ll stick to them for the rest of the lesson 1, but before moving along, here’s a quick introduction to some other approaches. There’s no need to write any code for this section – just read through it to gain a basic grasp of the concepts involved.
For various reasons, you may need to express colours in something other than hexadecimal. Here’s one such scenario: you wish to write some code that darkens the bright red fill. Firstly, consider that this shade of red:
fill('#FF0000')
can also be represented as:
fill(255, 0, 0)
As you can probably deduce, 255 is equivalent to FF (which itself is equivalent to 100%, as previously explained). To make the red half as bright, you can subtract 127 from 255. However, trying to subtract 127 from FF is more tricky because you are dealing with a mix of hexadecimal and decimal numbers.
In the previous scenario, the Processing colorMode() was set to RGB. You didn’t need to specify this, though, as it’s the default mode. In this mode, values represent the screen’s primary colours. However, there’s another mode you can make use of: HSB. Once set to HSB, one enters values representing Hue, Saturation, and Brightness.
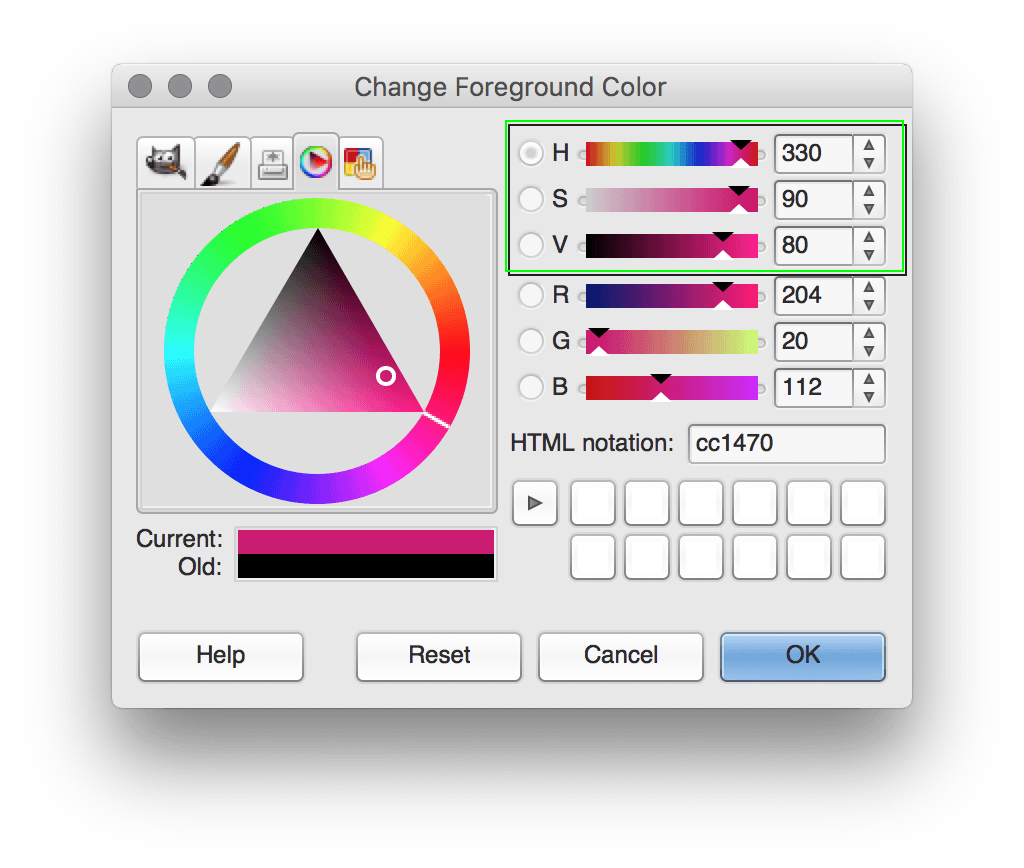
To mimic the GIMP mixer above, one must first set the colour mode accordingly using:
colorMode(HSB, 360, 100, 100)
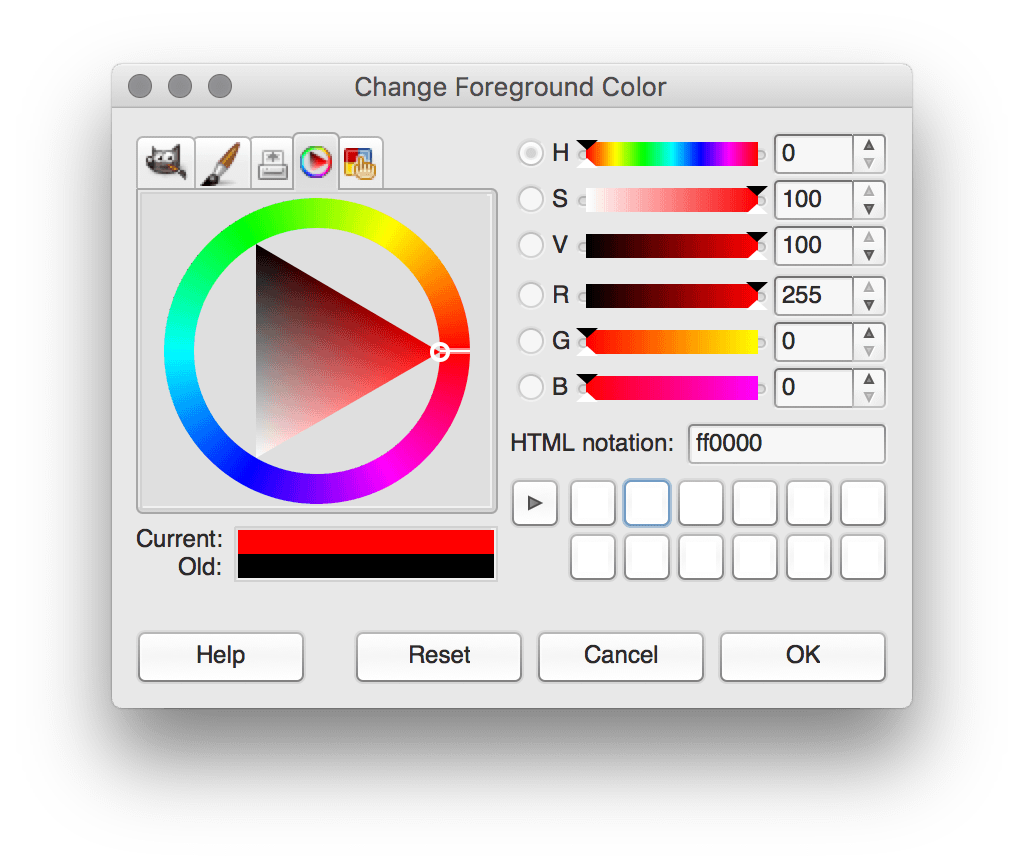
To explain: HSB represents the mode; 360 represents the range of degrees; and the two 100 arguments a range of 0–100% for saturation and for brightness. You’d now write a red fill as:
fill(360, 100, 100)
This is because red lies at 360 degrees of rotation on the Hue ring (which begins at ‘East’ in the GIMP mixer) with the saturation and brightness set to 100%:
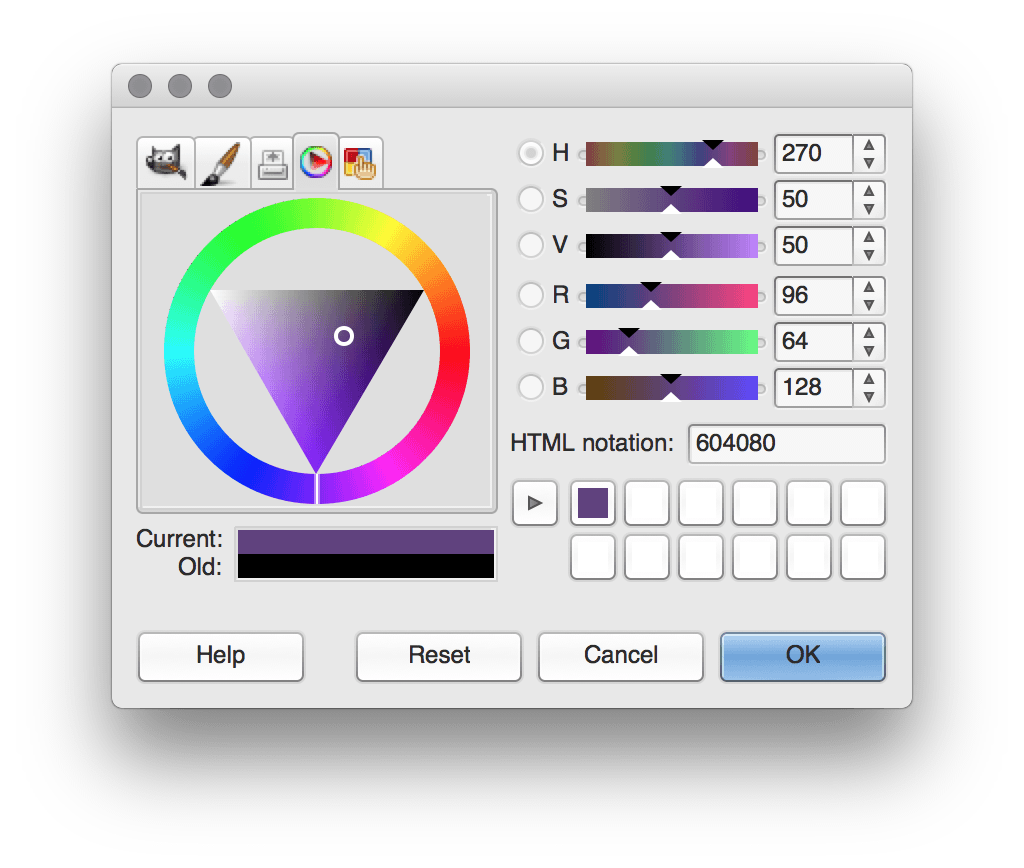
For a dark-greyish violet, one could use:
fill(270, 50, 50)
In HSB mode, shifting along the colour spectrum – from red to orange to yellow to green, etc. – is a matter of adding or subtracting from the H-value. Attempting the same in RGB mode is more complicated as you need to manage the quantities of each primary.
There will be more on colour in this lessons to come. Until then, you can consult the relevant reference entries should you need more detail:
colorMode()
fill()
1.3: Drawing »
Complete list of Processing.py lessons