I very recently stumbled upon py5, a Python version of Processing for Python 3.8+ that uses Processing’s core libraries under the hood (thanks to some JPype magic).
I’ve begun working on a Thonny plug-in, thonny-py5mode, that automates the installation steps I cover in this post. You can check out the project repo to track how work on the plug-in is progressing.
Previously, I wrote a post on combining the Thonny editor and p5. p5 is a sort of Python ‘clone’ of Processing, that doesn’t actually use Processing to generate visual output. But py5 is quite different. As its creator, Jim Schmitz, explains –
“Processing.py is the spiritual ancestor to and inspiration for py5. Py5 is similar to Processing.py in that both use Python syntax but their implementations are very different. Processing.py and py5 do not share any code but py5 benefits from code in the Processing core libraries written to accommodate Processing.py.”
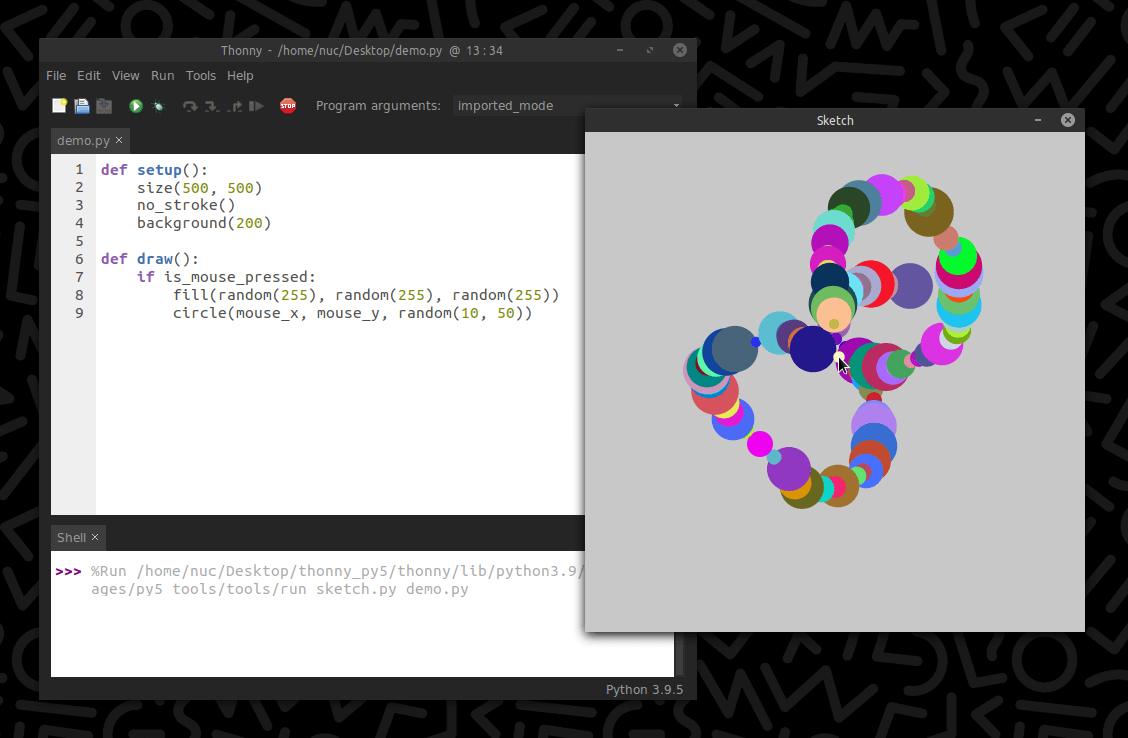
I’ve been involved with Processing.py for some time, and I got excited when I read this. So, I promptly set out to see if I could combine py5 with Thonny, a fantastic Python IDE for beginners. I’m delighted with the result (Figure 1).
I prefer to run applications in a ‘portable’ fashion where I can. This is useful for different reasons, including that it’s easier to distribute something that beginners can simply click and run. In other words, if you’re using a system like mine (Debian-based Linux, in this case), I can zip up the files and send the archive to you; all you need to do is extract and run it! No installation process required. What’s more, you can run a portable app off a USB drive.
This post covers how to roll your very own portable Thonny + py5 IDE on Linux (Mint in my case). Ubuntu and other Debian distros should work with these instructions. The process is similar for Mac and Linux setups, although I will not cover the procedure for those platforms. I’ve explained each step, though, so you can adapt the process accordingly for other platforms.
I’ll also provide a quick-start guide to writing py5 code with Thonny.
Creating a Portable py5 + Thonny App
Note that you’re creating a portable IDE. There are other ways to install py5 – with Python, Anaconda, and for Jupyter notebooks. The aim here is a self-contained bundle that runs even if the user’s computer is missing Python, Java, or any other packages that py5 or Thonny ordinarily require. The result is an IDE that resembles that of the Processing PDE.
To begin, open your terminal. At the time of writing, Thonny (at version 3.3.10) comes bundled with Python 3.7.9. However, py5 requires Python 3.8 or higher. But, there are “alt-variants” of Thonny that use Python 3.9 instead of 3.7, which you’ll use instead.
Step 1 – Start by installing a few Python 3.9 packages. This is necessary to build py5; you can remove them later.
sudo apt-get install python3.9 python3.9-dev python3.9-venv
Step 2 – Now, set up a new folder/directory named thonny_py5 for your Thonny + py5 install. Recall that this is a portable setup – you can move it anywhere you like later after you’ve completed these steps. I’ve decided to create this folder on my Desktop:
cd ~/Desktop
mkdir thonny_py5
cd thonny_py5
You’ve now changed to the thonny_py5 directory; your terminal prompt should reflect this. All of the commands that follow run relative to this location.
Step 3 – Download and extract the alt-variant of Thonny (that includes Python 3.9):
wget https://github.com/thonny/thonny/releases/download/v3.3.7/thonny-3.3.7-x86_64-alt.tar.gz
tar -xzvf thonny-3.3.7-x86_64-alt.tar.gz
rm thonny-3.3.7-x86_64-alt.tar.gz
Step 4 – Set up a temporary virtual environment to install the py5 packages; to install those packages in Thonny’s built-in Python location, there’s a symlink (the ln -s part). Once you’ve installed the necessary package(s), there are commands to delete the virtual environment:
python3.9 -m venv tempenv
cd tempenv/lib/python3.9
rm -r site-packages
ln -s ../../../thonny/lib/python3.9/site-packages site-packages
cd ../../../
source tempenv/bin/activate
pip install py5==0.4a2
deactivate
rm -r tempenv
Note that this has explicitly installed py5 version 0.4a2. At the time of writing, this the latest version. This is to ensure that these instructions work a year from now. You can omit the ==0.4a2 to install the most recent version, which you’d ideally use … but there’s no guarantee it’ll be compatible with these instructions.
Step 5 – py5 requires Java 11 (for running Processing core libraries). OpenJDK 11 works fine, so let’s use that:
wget https://download.java.net/openjdk/jdk11/ri/openjdk-11+28_linux-x64_bin.tar.gz
tar -xzvf openjdk-11+28_linux-x64_bin.tar.gz
rm openjdk-11+28_linux-x64_bin.tar.gz
This extracts OpenJDK in your thonny_py5 directory, alongside thonny:
thonny_py5
└─ jdk-11
└─ thonny
Enter the following command that sets the Java environmental variable upon starting Thonny – so that your computer knows where to find Java when it runs your py5 programs/sketches:
sed -i '2iexport JAVA_HOME=$PWD/../../jdk-11/' ./thonny/bin/thonny
Technically speaking, step 5 isn’t required if you have an existing Java runtime installed. But, remember, we’re aiming for a portable IDE.
Step 6 – Finally, create a run file in the root of your thonny_py5 directory to start Thonny:
printf '#!/bin/bash\ncd $(dirname $0)/thonny/bin;./thonny' > run
chmod +x run
Cleaning up – If you’d like, you can remove the Python 3.9 packages from your system:
sudo apt-get remove --purge python3.9 python3.9-dev python3.9-venv
sudo apt-get autoremove --purge
You can now move the thonny_py5 folder anywhere you like on your system, copy it to other Linux computers, and so on. It’s a self-contained app with Python, the py5 libraries, and Java.
You’re ready to test out Thonny and py5.
Running Thonny
Double-click your run file to start Thonny. If your system gives you the option to Run in Terminal / Display / Cancel / Run, select Run. It’s also handy to add this run file as an app to your ‘start’ menu.
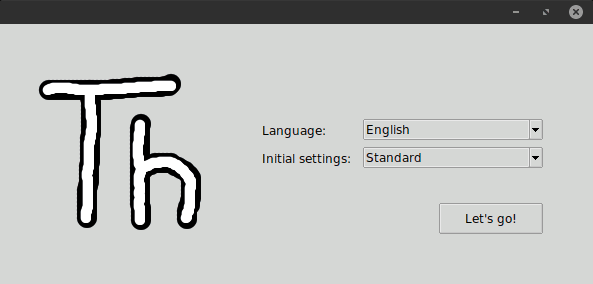
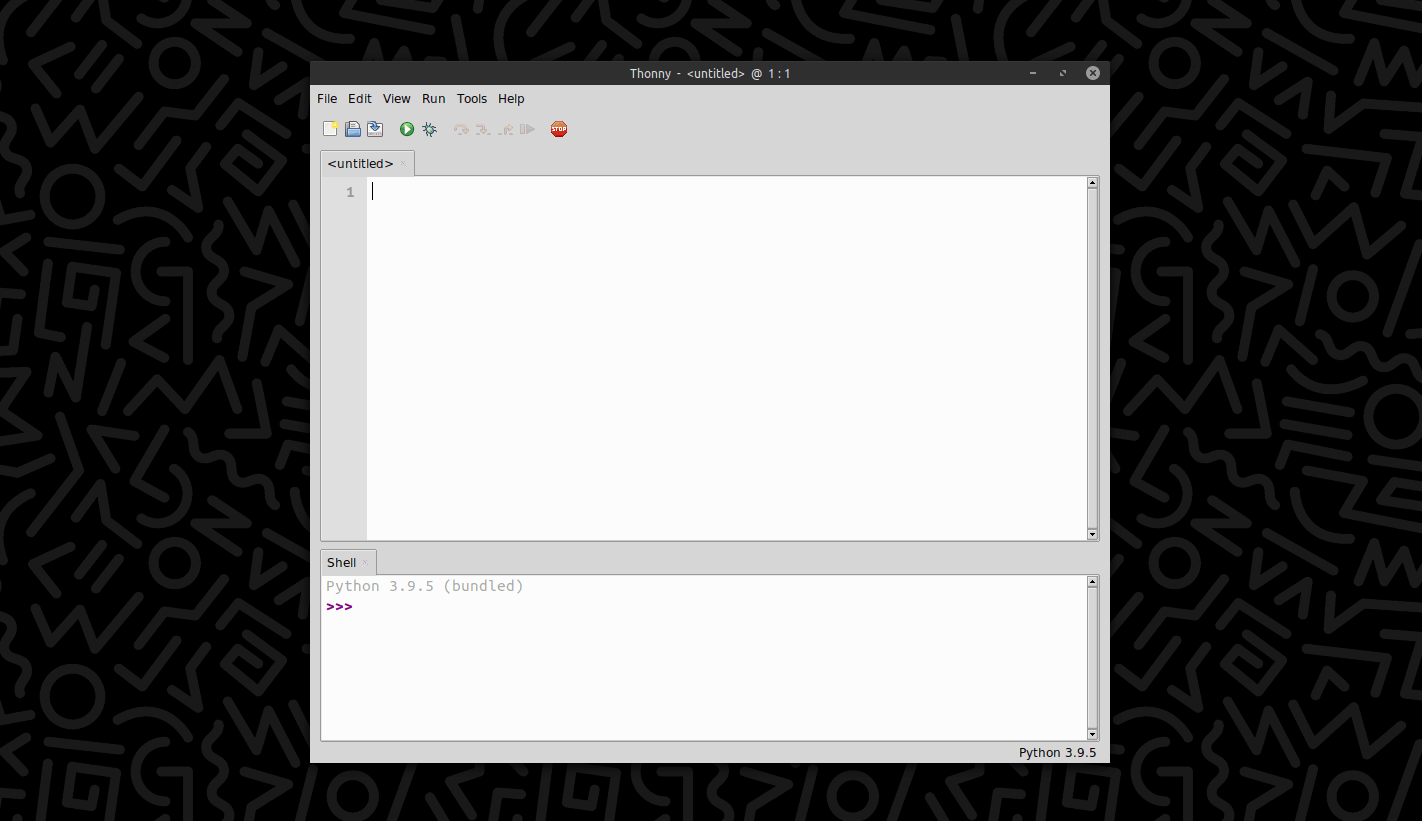
When you run Thonny for the first time, there’s a simple configuration step (Figure 2); Thonny opens after that. You’re ready to write code when you see the editor (Figure 3).
If you’ve already installed another Thonny instance on your machine, it’ll skip the configuration step and load your existing preferences.
Customising Thonny’s Appearance
To make everything more Processing-esque, you can change the Thonny theme by selecting Tools > Options…, then select the Theme & Font tab where you can change the UI theme and Syntax theme as you please (Figure 4).
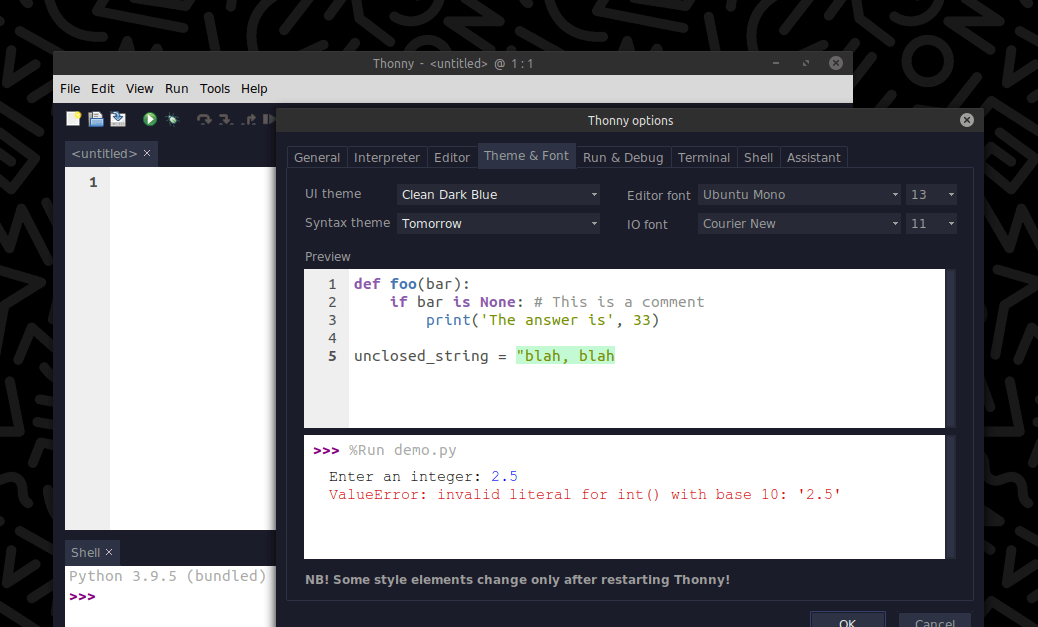
Note how, in Figure 4, the menu bar is still grey. You’ll have to restart Thonny to apply the theme fully.
Now let’s write some code!
Writing py5 Sketches
py5 has three modes – Module, Class, and Imported mode. I cover two of those here: Module and Imported.
To run files in Thonny, you can use the Ctrl-R, or F5, or click the run icon (green play button above the code editor). If you want to test this out quickly, try a print('Hello, World!'). If you haven’t saved your new file when you run, Thonny will prompt you to name and save it somewhere.
Py5 Module Mode
In Module mode, you’ll access py5 functionality through module-level functions and fields. For those coming from Processing.py, that means there’s a py5. in front of your functions and system variables. Here’s a simple example to start:
import py5

def settings():
    py5.size(500, 500)

def setup():
    py5.fill(255, 0, 0)
    py5.no_stroke()

def draw():
    py5.circle(py5.mouse_x, py5.mouse_y, 10)
    print(py5.frame_count)

py5.run_sketch()
Note the differences compared with Processing.py. First, you must add the import py5 line. Functions like noStroke() are written as no_stroke() in py5, and frameCount becomes frame_count. This converting camelCase to snake_case is consistent throughout py5. Also, you must include a py5.run_sketch() line to actualize your sketch. Of course, print() is a standard Python function that requires no py5 prefix.
You can refer to the py5 reference for a complete list of what’s available in py5:
http://py5.ixora.io/reference/
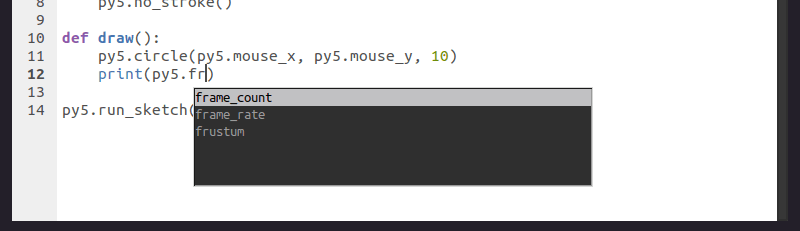
It’s also handy to note that Thonny includes code completion, so you can hit the Tab key or Ctrl-Space to select what you need from py5 (Figure 5).
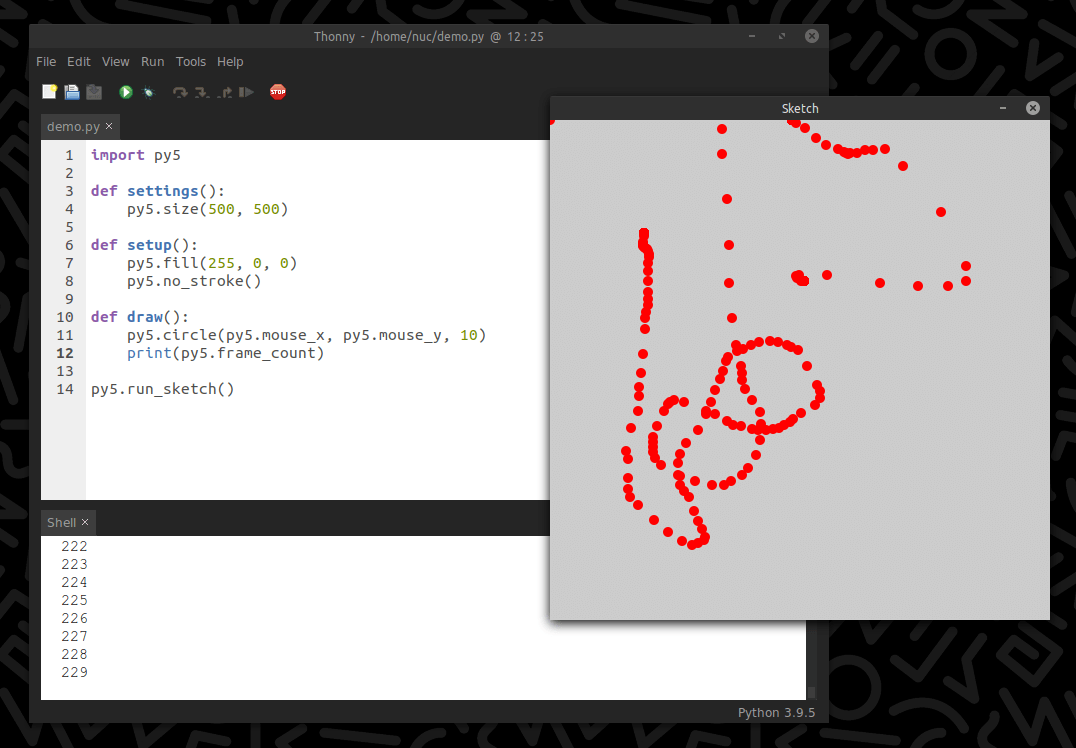
Run the sketch to view the result (Figure 6).
Thonny is full of useful features, many in the form of panels that you can activate from the View menu. I won’t cover those here.
That concludes this brief introduction to Module mode. The Imported mode is even closer to Processing, which I cover next.
Py5 Imported Mode (for a more authentic Processing experience)
I’ll begin with a description for Imported mode from the official py5 documentation –
“Imported Mode was originally designed to be used by beginner programmers. It is analogous to the Processing code users write in the Processing Development Editor (PDE).”
To get this working nicely, you’ll need to make a small modification to Thonny. Within your thonny_py5 folder, you’ll need to locate a file named running.py; here’s the path:
thonny_py5/thonny/lib/python3.9/site-packages/thonny/running.py
Open this file with a code/text editor and search for the following line:
cmd_parts = ["%" + command_name, rel_filename] + args
Insert the following new code:
        ...
        cmd_parts = ["%" + command_name, rel_filename] + args
        # insert this new code ▼▼▼
        if args and args[0] == 'imported_mode':
            import site
            rs_file = '/py5_tools/tools/run_sketch.py'
            rs_path = str(site.getsitepackages()[0]) + rs_file
            cmd_parts = ["%" + command_name, rs_path, rel_filename]
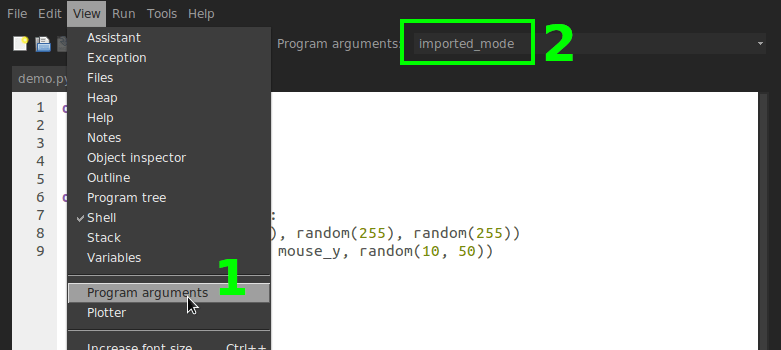
Save the changes. This will tell Thonny to use a special py5 utility script to run your code. “But, wait–”, I hear you say. What if you don’t want to use it – like when you’re using Thonny for Module mode or regular-old Python? Don’t fret – Thonny will run its normal Python interpreter by default. This utility script only fires if you add imported_mode to your Thonny Program arguments. To do this, select View > Program arguments, then enter imported_mode into the field that appears (Figure 7).
imported_modeNow you can write your code without any py5 prefixes, and import and run_sketch() lines. Here’s the same simple example from above converted to Imported mode:
def setup():
    size(500, 500)
    fill(255, 0, 0)
    no_stroke()

def draw():
    circle(mouse_x, mouse_y, 10)
    print(frame_count)
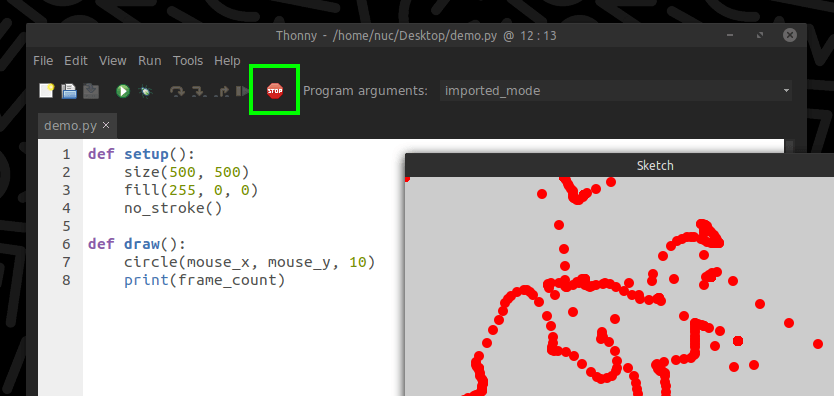
This is beginning to look a lot more like Processing code! You can run the sketch. Note that you can also use the stop button to stop/exit sketches (Figure 8).
If you restart Thonny, it’ll recall the Program arguments details from the last session. You must clear this field to return to normal Python mode.
Installing Packages
You can install additional Python libraries to add new functionality to your py5 sketches. In this section, you’ll install a 2D Python physics library, Pymunk. The techniques you use here apply to installing other Python packages in Thonny.
NOTE: One of the neat things about JPype is that it makes the Java Processing jars available to the CPython interpreter – unlike Jython for Processing.py, which can’t support third-party Python libraries that use extensions written in C. It’s for this reason that the popular NumPy library will run fine in py5 but not Processing.py.
You need to install Python packages using Thonny’s built-in pip command. Open your terminal and change to your Thonny bin directory:
cd ~/Desktop/thonny_py5/thonny/bin
Note that my thonny_py5 app resides on my Desktop; your path is different if you’ve moved your folder elsewhere.
Now install Pymunk:
./pip3 install pymunk
This pip command (within your Thonny app) installs all of its packages to Thonny’s lib/python3.9/site-packages/ location. Pymunk is now part of your portable app.
Now that you’ve installed Pymunk, you can use this library in your sketches.
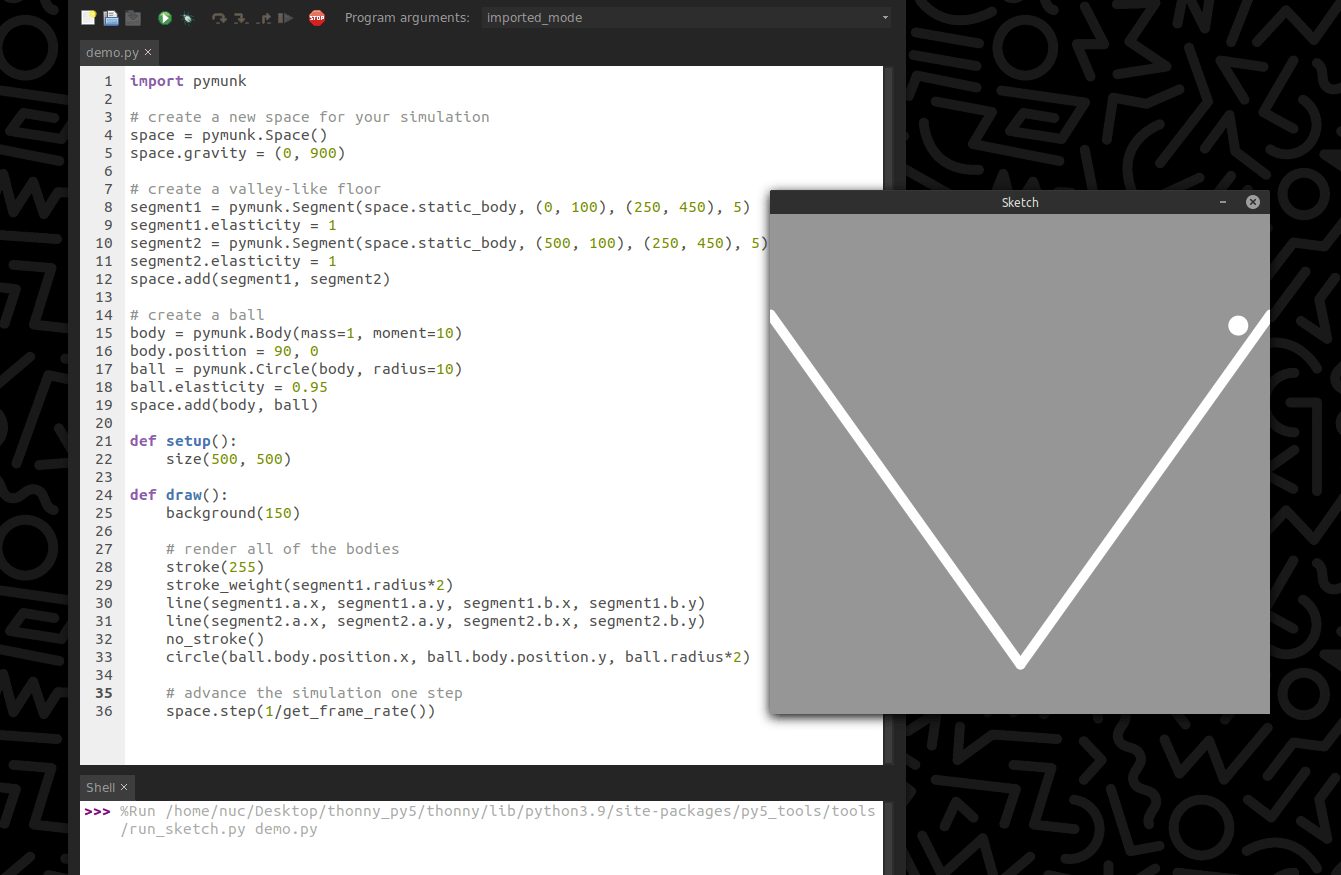
A Pymunk example
In Thonny, using Imported mode, and add the following code to a new file:
import pymunk

# create a new space for your simulation
space = pymunk.Space()
space.gravity = (0, 900)

# create a valley-like floor
segment1 = pymunk.Segment(space.static_body, (0, 100), (250, 450), 5)
segment1.elasticity = 1
segment2 = pymunk.Segment(space.static_body, (500, 100), (250, 450), 5)
segment2.elasticity = 1
space.add(segment1, segment2)

# create a ball
body = pymunk.Body(mass=1, moment=10)
body.position = 90, 0
ball = pymunk.Circle(body, radius=10)
ball.elasticity = 0.95
space.add(body, ball)

def setup():
    size(500, 500)

def draw():
    background(150)

    # render all of the bodies
    stroke(255)
    stroke_weight(segment1.radius*2)
    line(segment1.a.x, segment1.a.y, segment1.b.x, segment1.b.y)
    line(segment2.a.x, segment2.a.y, segment2.b.x, segment2.b.y)
    no_stroke()
    circle(ball.body.position.x, ball.body.position.y, ball.radius*2)

    # advance the simulation one step
    space.step(1/get_frame_rate())
Run the sketch to begin the simulation. The ball drops from around the top-left of the display window; it bounces around before settling to a standstill in the trough of the V (Figure 9).
For more on Pymunk, refer to the official website which contains an API reference, tutorials, a showcase, and more:
That’s all that I’ll cover here. I hope that’s inspired you. The possibilities for creative coding using Thonny, py5, and other Python libraries are truly vast and exciting.
Final Words
py5 is new and exciting, and I’m sure it’s going to evolve rapidly. The creator has commented that “the Processing Editor does not currently support py5, but perhaps one day it will.” So py5 might be running Python Mode for Processing sometime in the future, integrated seamlessly into the Processing PDE.
For now, Thonny offers a very capable and attractive editor to complement py5. This setup can be rolled into a portable application for easy distribution, just like the Processing PDE. Thonny also includes a robust plug-in system – so maybe there’s an opportunity to compile the steps I’ve outlined in this post into some convenient, easy to activate plug-in. Perhaps this integrates useful Processing PDE features into Thonny, like a colour mixer, support for files with .pyde extensions, and more.
But why stop there? We might even develop other Thonny plugins – like one for p5 (when you want to avoid Java altogether), pyp5js (for exporting to JS/web browsers), Shoebot, and even some headless version of Blender (for some really powerful 3D) … but I digress.
If you like py5, get involved! Just using the software and reporting issues is easy (and fun). Here’s some info on how to help, and an inspiring community manifesto:
• How to Help: http://py5.ixora.io/help/
• Community: http://py5.ixora.io/community/
The py5 reference and other documentation are coming along nicely, especially considering how young the project is. Plus, py5 runs great, too, thanks to leveraging the very mature and established Processing ecosystem. This also means that you can tap into a wealth of Processing learning materials and resources (with a bit of translation into Python/py5 required). There’s also a discussion about translation tools that attempt to convert Processing.py or camelCase Python code to use function names that py5 expects – think: noStroke() instead of no_stroke(), etc.
You can follow py5 project updates here: https://ixora.io/tags/py5/; and via RSS feed.
End
References
- http://py5.ixora.io/
- http://py5.ixora.io/about/
- http://py5.ixora.io/reference/
- http://py5.ixora.io/tutorials/
- https://py.processing.org/
- https://thonny.org/
- http://www.pymunk.org/