At the time of writing, Blender is on release 2.83; this is also a long term support release (LTS).
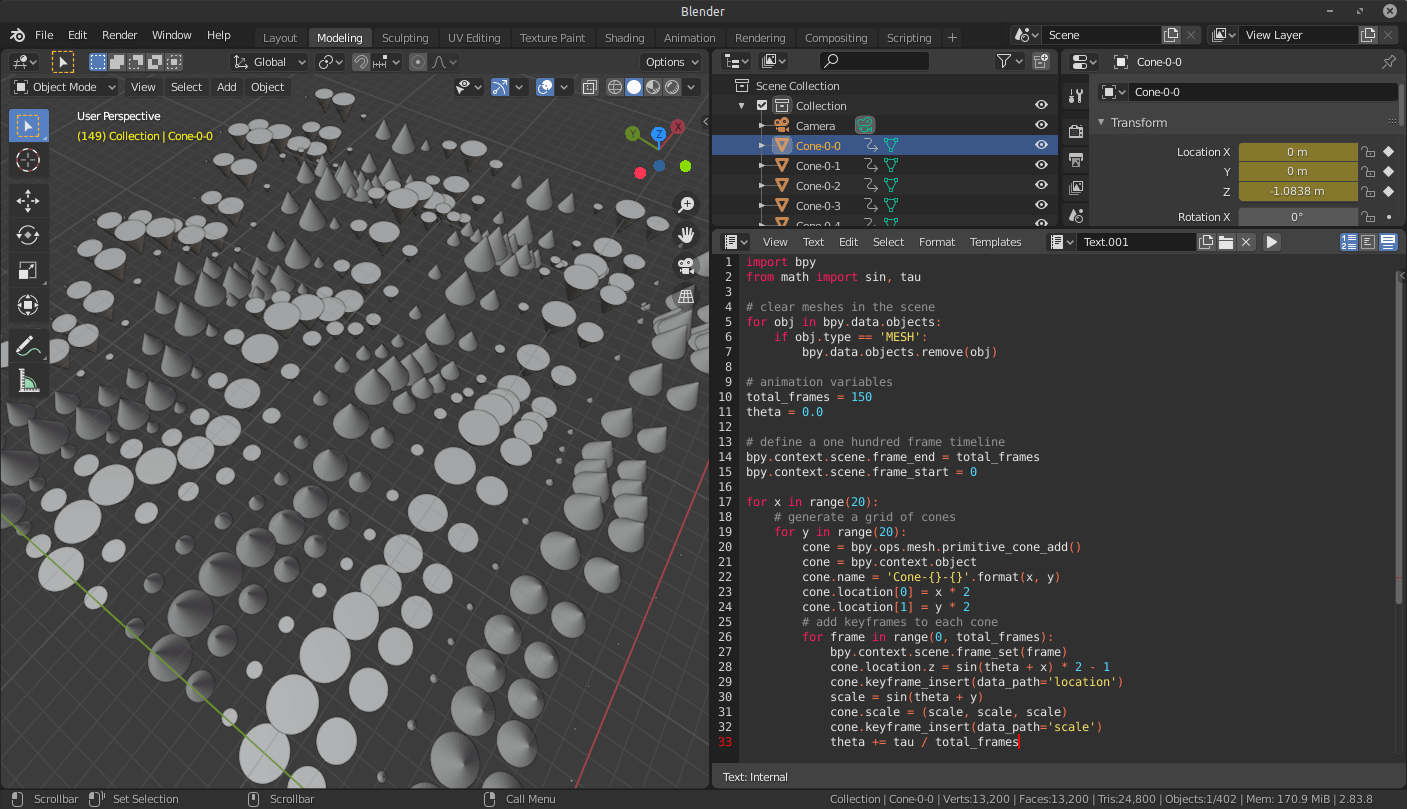
In this series of tutorials, I’ll introduce Blender as a tool for creative coding. Blender is open-source software for 3D modelling and animation that can also handle compositing, video editing, and 2D animation. Artists and animators operate Blender using a graphic user interface (Figure 1.1), but it also features a Python API that can do everything the GUI can and more. That means you can use Python code draw, animate, and manipulate 3D objects.
Figure 1.1: The Blender modelling layout with a panel for editing code
I have an interest in creative coding using the Python programming language. I began experimenting with Blender scripting largely via Python Mode for Processing. Processing’s Python Mode is a fantastic entry point into the world of creative coding, the Python language, and programming in general (I think it’s so great that I wrote a whole series of lessons covering it). You won’t outgrow Processing, but you might have the urge to delve into some more advanced 3D stuff—particle systems, rigid-body/fluid/cloth dynamics, metaballs, volumetrics, and so on. With Blender scripting, you get access to all of that and a powerful render engine to output your creations in high-resolution image and video formats.
I’ve meant to get into Blender for a while; the Python API was just the nudge I needed. This tutorial series serves as a record of my discoveries and a guide for others. I’ll add new posts as I progress.
What You Should Know Already
If you have no programming experience, it’s best to learn some Python first (using Python Mode for Processing or some other Python environment). If you’re familiar with some other programming language (JavaScript, C#, etc.), you should cope fine; Eric Matthes has created a useful collection of Python cheat sheets you might find handy.
Some Blender knowledge is useful but not essential.
Getting Started
Here, I’ll step you through installing Blender, launching it via the terminal, accessing its scripting interface, and running your first line of code.
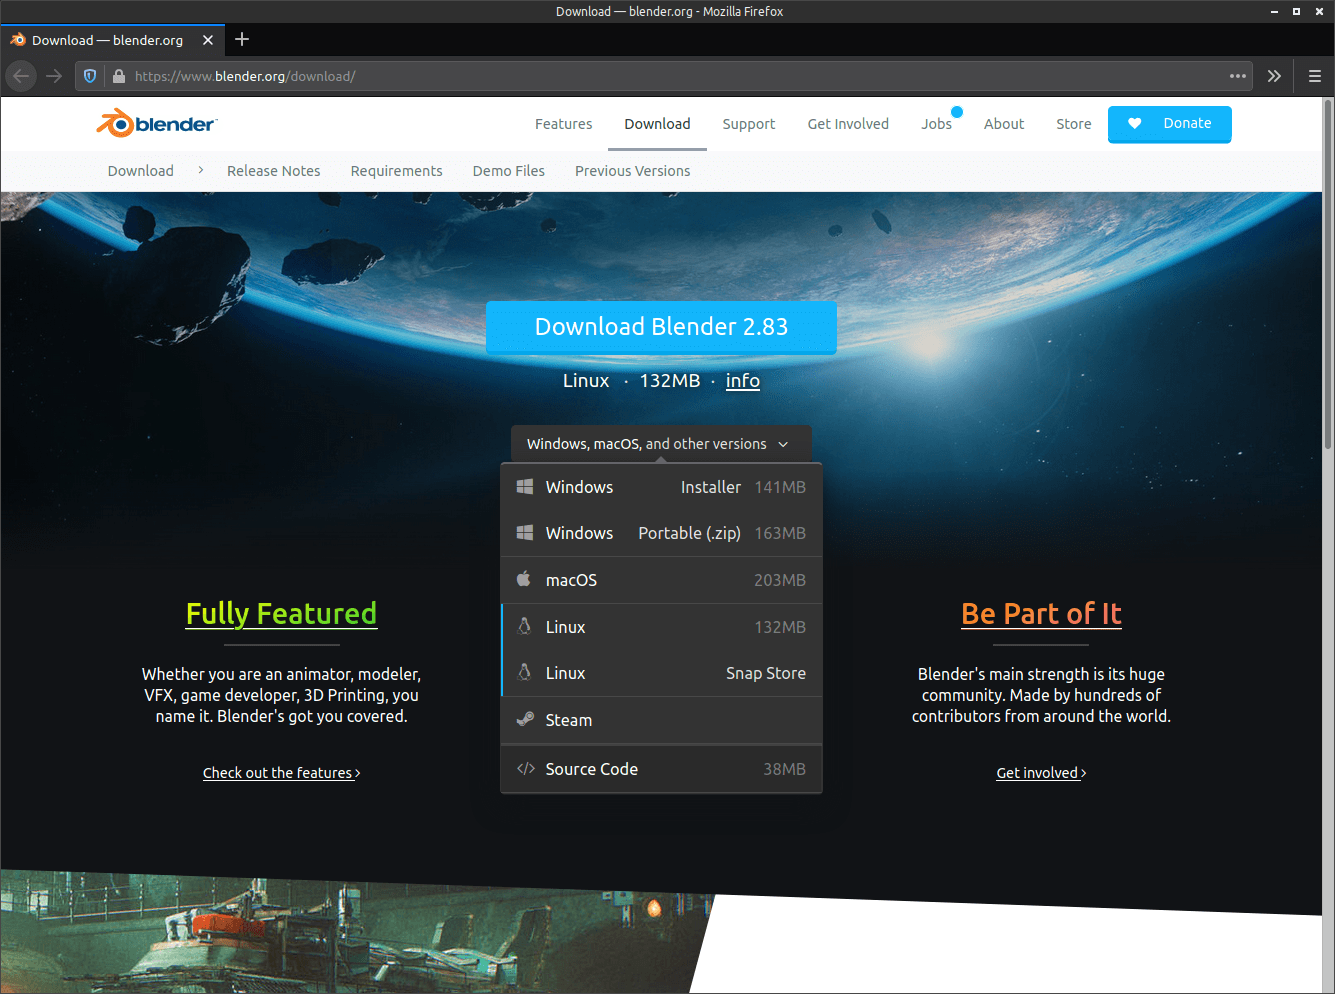
Download Blender from the Blender website at https://www.blender.org/download/. On the Download page, click the other versions option (Figure 1.2). I’m using a portable version. I prefer not to use installers if I can; this way, I know exactly where the Blender application is stored, which is useful for the command line step (coming up shortly). For Windows, download the Portable(.zip) file. For Linux, download the non-Snap-Store version. For macOS, there’s just one option, which is the one you want.
Figure 1.2: Blender download page
Once the download is complete, extract the archive wherever you like—on your desktop, in your documents folder, or wherever you prefer. The extracted folder contains the application files—everything you need to run Blender. On macOS, you choose where you store the application by dragging it to that location.
Launching Blender Using the Command Line
The command line is a text interface to your computer, where you can perform different operations by typing commands. You access the command line using your terminal application. On Windows, the application is named Command Prompt; on macOS, it’s called Terminal; Linux folk, you know about your terminal already ;)
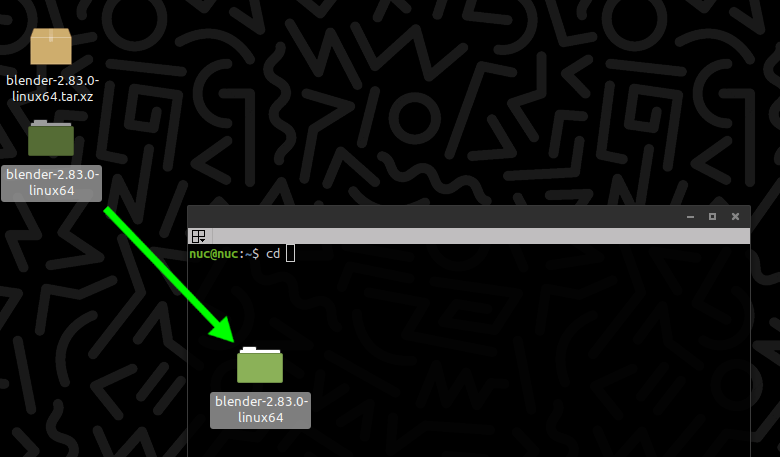
In a new terminal window, type cd (followed by the space), then drag the extracted folder into the terminal window (Figure 1.3). This will look a little different for each system, but the principle is the same. If you used the Blender installer (as opposed to the portable version), you need to locate the installed files on your system. On macOS, first you have to right-click on the Blender application, select Show Package Contents, navigate to Contents > MacOS, and drag the MacOS folder into the terminal.
Figure 1.3: Type cd and drag the folder into the terminal
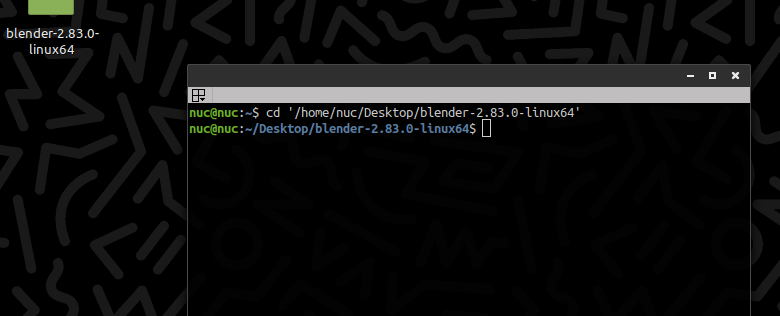
This will write in the path (Figure 1.4). Hit enter to change to the Blender directory. The prompt (text to the left of the cursor) will indicate that you’re in the right place. Again, this will look a bit different on your system.
Figure 1.4: The prompt confirms that you're in the correct place (path in blue text)
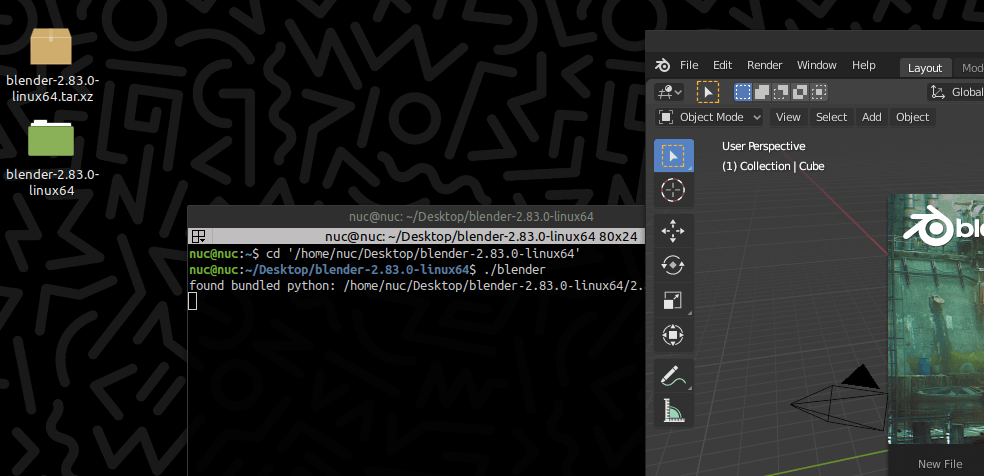
Open the Blender executable from the command line. On Windows, type blender.exe; for macOS and Linux, type ./blender. This will open Blender from the command line. The terminal window should remain open after Blender is launched (Figure 1.5).
Figure 1.5: Launching Blender from the terminal on Linux
You’ll be using the terminal while you develop Blender scripts.
Your First Line of Blender Script
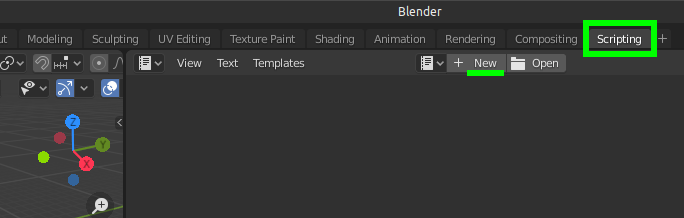
Time to enter your first line of code! In Blender, switch to the Scripting tab, then click New (Figure 1.6).
Figure 1.6: Switch to the Scripting tab and start a new script
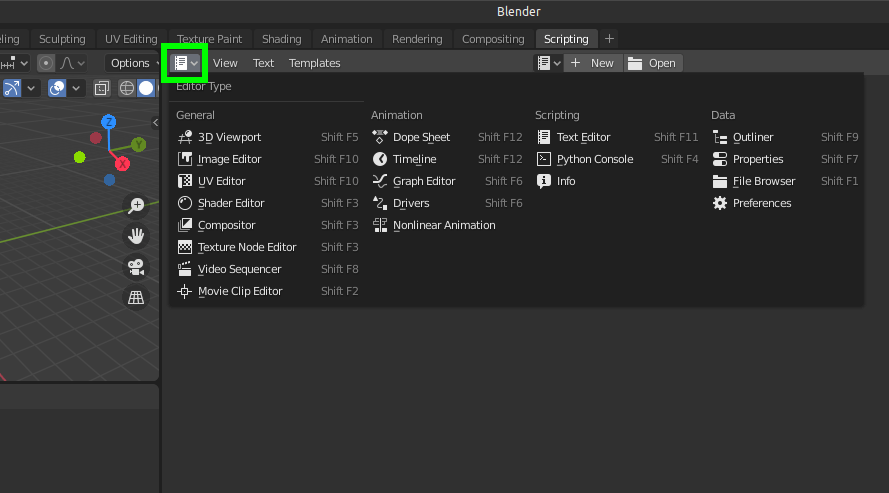
NOTE: The Blender window is divided into areas that contain editors. An area is a rectangular partition that you can resize (or divide further). For example, the largest area in the Scripting workspace is for the Text Editor, which you’ll use to type code. Selecting any workspace will present a predefined arrangement of editors; there is a button to switch editors at the top-left corner of each area (Figure 1.7).
Figure 1.7: The Editor Type selector
There’s no need to change the Text Editor right now.
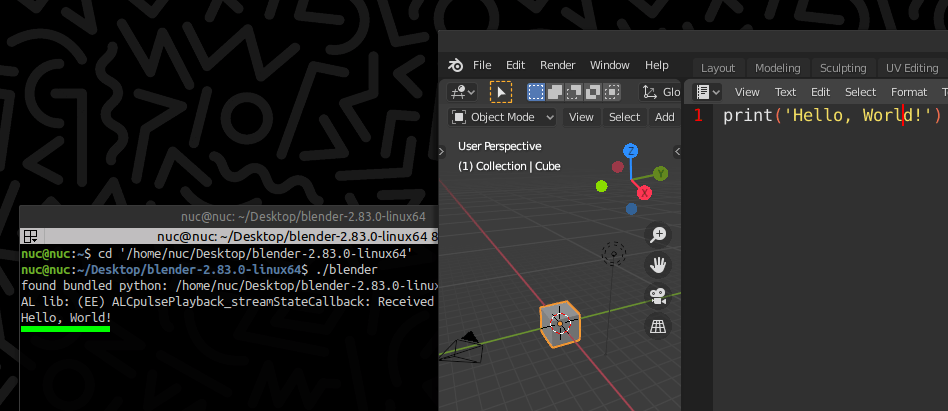
Enter print('Hello, World!') into the text editor (Figure 1.8); then run the script using Alt-P (or clicking the ▶ button). The terminal should display a Hello, World!.
Figure 1.8: The terminal displays Hello, World! when you run the script
Excellent! You’ve got a working Blender script, with a terminal window to monitor print statements and errors.
Just above where you entered print('Hello, World!'), there’s a link to access a Text menu. Use the Save As… option to save the script as hello_world.py.
Section Summary
You’re all set up for developing Blender scripts. You installed Blender, launched it from the terminal, and ran your first line of code.
Next up, I’ll review some useful Blender features for writing code.